Announcement

Collapse
No announcement yet.

Painting bare metal/bare plastic

Collapse
X
 
  • Filter
  • Time
  • Show
Clear All
new posts

    Painting bare metal/bare plastic

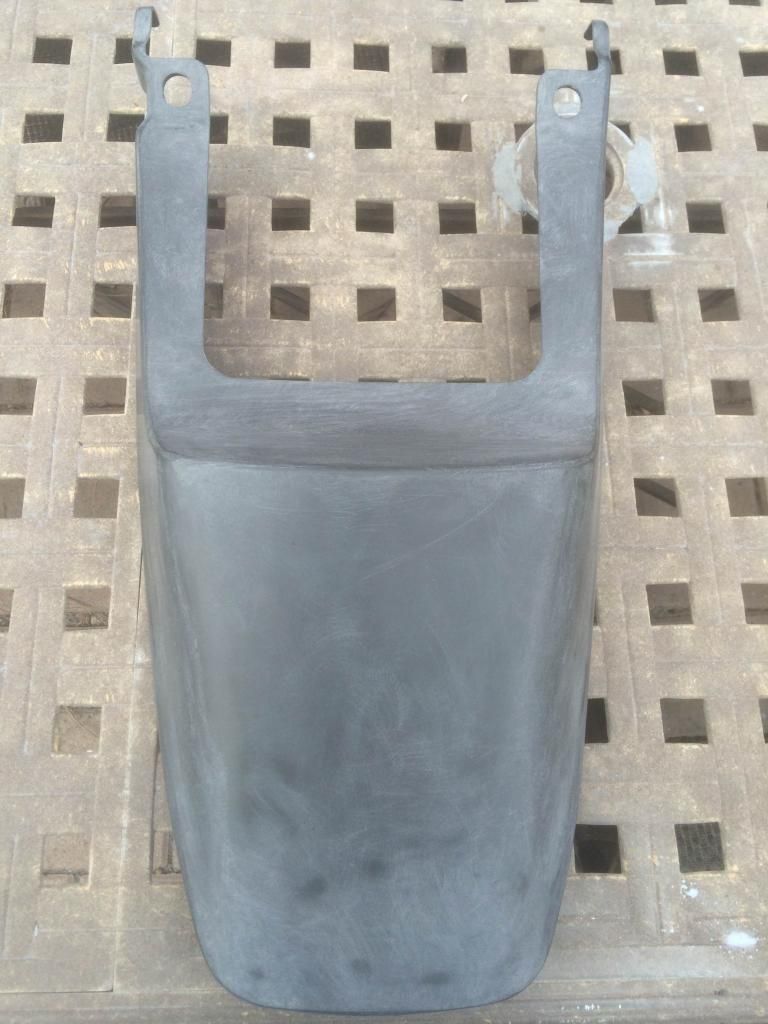
    In the process of painting the bike (its my KZ650, hopefully nobody gets mad at a non-GS question!), I sanded the tank all the way down to bare metal. I also sanded the side covers and tail piece to bare plastic because the primer underneath was cracking for some reason. I know I need to use an adhesion promoter on the plastic, but I'm not sure what type of primer/sealer to use. I've got a couple of questions now:


    1. Is there a primer/sealer that works well for both bare metal and bare plastic? I want to avoid paying for two separate primers, if possible. I have access to a hvlp gun or I can do rattle can (I have read good things about the spraymax 2k primer).
    2. I sanded the plastic to 600 grit wet and the tank to 80 grit dry. I am wondering what to sand them to/scuff them both with prior to laying the primer.


    Any help greatly appreciated!


    (yes, there is some bodywork that needs to get done prior to the painting).

    #2
    DPLF works on both metal and quite a few types of rigid plastics.
    De-stinking Penelope http://thegsresources.com/_forum/sho...d.php?t=179245

    http://www.thegsresources.com/_forum...35#post1625535

    Comment


      #3
      Yep, PPG DPLF is what I've used very successfully in the past as well. The stuff grabs onto just about anything. No issues with using on the plastic parts as well. It's usually compatible with most top coats. Some will say to use an etching primer but the DPLF alone has never failed. If you want to sand it after you may want to shoot some 2K urethane primer/surfacer because the DPLF is not designed to be sanded.
      http://img633.imageshack.us/img633/811/douMvs.jpg
      1980 GS1000GT (Daily rider with a 1983 1100G engine)
      1998 Honda ST1100 (Daily long distance rider)
      1982 GS850GLZ (Daily rider when the weather is crap)

      Darn, with so many daily riders it's hard to decide which one to jump on next.;)

      JTGS850GL aka Julius

      GS Resource Greetings

      Comment


        #4
        Most epoxy primers will work fine on both metal and steel. Don't think you need adhesion promoter. I've used DPLF before and it's great stuff, but for my most recent project I used Transtar epoxy.

        I'd fix that dents with body filler before shooting the primer. Use phosphate wash first too since it will give the metal some "tooth" for the paint to hang onto.

        Originally posted by JTGS850GL View Post
        If you want to sand it after you may want to shoot some 2K urethane primer/surfacer because the DPLF is not designed to be sanded.
        I sand DP primer. Use 600/800 grit paper wet or a gray scotchbrite pad. It's not a fill primer, but sanding scratches and the like can be filled if you lay down three coats instead of two. Beats purchasing 2k filler if your body work is good.
        Last edited by Nessism; 02-02-2015, 04:46 PM.
        Ed

        To measure is to know.

        Mikuni O-ring Kits For Sale...https://www.thegsresources.com/_foru...ts#post1703182

        Top Newbie Mistakes thread...http://www.thegsresources.com/_forum...d.php?t=171846

        Carb rebuild tutorial...https://gsarchive.bwringer.com/mtsac...d_Tutorial.pdf

        KZ750E Rebuild Thread...http://www.thegsresources.com/_forum...0-Resurrection

        Comment


          #5
          Finish your body filler work, followed by 3-4 coats of high-build primer on all the parts. You should have at least a 180 grit surface before spraying it. 80 grit on the tank would be better so the primer has enough tooth to adhere. You'll definitely have adhesion problems if you sand it too smooth before the first primer. I always prime at least once over the coarser surfaces, sand with 180 grit, re-prime and finish sand with 400 before laying down the base coats of color. You have to give each step enough to adhere to before moving on to the next step.
          1979 GS1000S,

          1982 Honda CX500 Turbo, 1982 Honda MB5 w/CR80 motor, 1977 Honda "nekid" Goldwing, 1976 Honda CB550F cafe', 1972 Honda XL250 cafe'

          Comment


            #6
            Thanks for nice post. This is helpful for me, I do some airbrush bike painting job. I used such a paint from Createx brand some time ago. I bought it on http://www.artistsupplysource.com/ca...9/airbrushing/ website. It is a really decent one, I like it.

            Comment


              #7
              Ok, followed the advice here and ended up with a nice deep black but a considerable amount of orange peel. I wet sanded with 2k grit then buffed with an orbital sander and 3M rubbing compound. No more orange peel (mostly), but the color seems to have faded quite a bit. Should I buff it more with the rubbing compound or move on to some type of polish? I'd really like the bring back the deep black color. Thanks for the help guys.

              (upper left photo is before sanding, then to the right is while sanding, bottom two are after buffing- sorry, I can't figure out how to post multiple pictures)

              combine_images.jpg

              Comment


                #8
                How about some detail on your sanding practice. What grits and how did you do it? What buffing compound and what polishing compound did you use? How did you do the buffing out? All are needed to get the color and gloss back to where it needs to be when removing orange peel.

                PS: Orange peel problems are usually a technique and condition issue at the time of painting.
                http://img633.imageshack.us/img633/811/douMvs.jpg
                1980 GS1000GT (Daily rider with a 1983 1100G engine)
                1998 Honda ST1100 (Daily long distance rider)
                1982 GS850GLZ (Daily rider when the weather is crap)

                Darn, with so many daily riders it's hard to decide which one to jump on next.;)

                JTGS850GL aka Julius

                GS Resource Greetings

                Comment


                  #9
                  2k grit wet sand. Did it on opposing 45 degree angles to avoid grooves (switched back and forth). I used 3M Perfect It rubbing compound with a random orbital sander and a compound foam pad on medium high speed.

                  I didn't use any polishing compound because the guy at the auto paint supply store said I wouldn't need it. Would using some polishing compound help bring back the black? Or do I need to buff it more?

                  I have no doubt the orange peel was due to my bad technique, this is my first paint job.

                  Comment


                    #10
                    Originally posted by clutchthirty View Post
                    2k grit wet sand. Did it on opposing 45 degree angles to avoid grooves (switched back and forth). I used 3M Perfect It rubbing compound with a random orbital sander and a compound foam pad on medium high speed.

                    I didn't use any polishing compound because the guy at the auto paint supply store said I wouldn't need it. Would using some polishing compound help bring back the black? Or do I need to buff it more?

                    I have no doubt the orange peel was due to my bad technique, this is my first paint job.
                    Even after sanding the finish with 2,000 grit, the polishing process also has to be done in steps to get the depth you're looking for, especially with black. Did you sand the finish with 800-1,000-1,500, then 2,000..? If not, you'll never get all the sand scratches out. The first step polishing (with a buffer, not an orbital sander) should be with the compound and a wool pad, followed by a less aggressive medium compound with a yellow pad, and then a polishing, swirl remover with a soft black pad. Follow the steps and you should have the results you're hoping for.
                    1979 GS1000S,

                    1982 Honda CX500 Turbo, 1982 Honda MB5 w/CR80 motor, 1977 Honda "nekid" Goldwing, 1976 Honda CB550F cafe', 1972 Honda XL250 cafe'

                    Comment


                      #11
                      Agree with nvr2old but, be careful not to burn through the paint when using the wool pad.
                      http://img633.imageshack.us/img633/811/douMvs.jpg
                      1980 GS1000GT (Daily rider with a 1983 1100G engine)
                      1998 Honda ST1100 (Daily long distance rider)
                      1982 GS850GLZ (Daily rider when the weather is crap)

                      Darn, with so many daily riders it's hard to decide which one to jump on next.;)

                      JTGS850GL aka Julius

                      GS Resource Greetings

                      Comment


                        #12
                        Originally posted by nvr2old View Post
                        Even after sanding the finish with 2,000 grit, the polishing process also has to be done in steps to get the depth you're looking for, especially with black. Did you sand the finish with 800-1,000-1,500, then 2,000..? If not, you'll never get all the sand scratches out. The first step polishing (with a buffer, not an orbital sander) should be with the compound and a wool pad, followed by a less aggressive medium compound with a yellow pad, and then a polishing, swirl remover with a soft black pad. Follow the steps and you should have the results you're hoping for.
                        Thanks for the reply. I just used the 2000 grit cause that's what the paint shop recommended. Do you have a polish recommendation? I used the 3M rubbing compound but their machine polish is very expensive- $30 for 16 oz

                        Comment


                          #13
                          The 3M Perfect-it compound is a very good product. It's exactly what you need. Unfortunately, it's only the first step. The guy that sold it to you probably should've known that. The other two products are spendy, for sure. You might try a polishing formula available at O'Reilly's or Auto Zone. Their polishes (not rubbing compounds) aren't quite as abrasive and would at least maybe take it to the step beyond where you are now. You can also get a complete package of mini wool, yellow, and black buffer pads at an auto paint store along with a drill attachment. I would at the very least try the yellow pad with the same 3m Perfect-it that you have, maybe even wetting it down a tiny bit to soften it. You'll be amazed at what using the progressive buffer pads will accomplish. If you have a good multi-speed drill, this would still be a way better option then an orbital sander to do the work. You need variable rpm's. Faster for the heavier wool pad and compound, slower as you go finer. I've used them many times and they work really well.
                          1979 GS1000S,

                          1982 Honda CX500 Turbo, 1982 Honda MB5 w/CR80 motor, 1977 Honda "nekid" Goldwing, 1976 Honda CB550F cafe', 1972 Honda XL250 cafe'

                          Comment


                            #14
                            Sorry, my post said orbital sander but I actually used a random orbital buffer. I ended up getting the 3M Polish and pads. It helped bring some more color out but probably not worth the amount of money it cost. It does have a nice mirror finish though. I'm going to let it cure for a month then wax it, hopefully that will bring back the depth. Thanks again for the help!

                            Comment

                            Working...
                            X