Announcement
Collapse
No announcement yet.
fixing broken float towers
Collapse
X
-
 crazy5
Well, it wouldn't have... But now that you've gone and said that, it's pretty much a given that it'll happenOriginally posted by tkent02 View Post
-
Forum LongTimerBard Award Winner
GSResource Superstar
Past Site Supporter- Jul 2005
- 15161
- Marysville, Michigan
Four years later and its still running fine.Originally posted by crazy5 View Postbut I think pinning the broken post would be a cleaner fix and just as secure. I do have the other halves of the posts, and the hole for the pin is just fine.
make the pin .002~.003 larger than the holes you drill.
Comment
-
 7981GS
Comment
-
 musicman
 -
 crazy5
Beautiful! I used a socket to support the post while I tapped out the pins from the unbroken carbs with a punch, but this way looks sooooo much easier!Originally posted by 7981GS View PostHow to NOT break them in the first place...
(Click on image for the, less than one minute, video.)
Eric
Off to Harbor Frieght!
Comment
-
 7981GS
Comment
-
 crazy5
Decided to go drill the posts, using a 5/64" drill bit (started w/ 1/16", but the bit broke), completely free hand. Worked out pretty good. I eyeballed the center of the posts on both sides, and it came out great. Was going to use the shaft of a pop-rivet I had laying around, but after drilling, the fit is just a hair on the loose side. It's not wobbly at all, but I can slip the post on/off easily.
When I put post on, and then put the hinge pin through both posts, it's nice and secure. This is probably good enough (it's not going to the moon), but I'd rather have it be nice and snug.
Is there a reason in particular that people say to use brass? or would any metal the right diameter work?
Comment
-
Cdnoel repaired mine two years ago using the procedures found in the tips and tricks section and they are running great stillCowboy Up or Quit. - Run Free Lou and Rest in Peace
1981 GS550T - My First
1981 GS550L - My Eldest Daughter's - Now Sold
2007 GSF1250SA Bandit - My touring bike
Sit tall in the saddle Hold your head up high
Keep your eyes fixed where the trail meets the sky and live like you ain't afraid to die
and don't be scared, just enjoy your ride - Chris Ledoux, "The Ride"
Comment
-
This procedure?Originally posted by cowboyup3371 View PostCdnoel repaired mine two years ago using the procedures found in the tips and tricks section and they are running great still
You'll need a file, 1/8 drill bit, 6/32 screw, hack saw, center punch, hammer, pliers with flat sides and a drill with a level bubble on the back.
Measure the exact height of the post as it shoud be.
File the post and the surface on the carburetor side flat enough for you to drill a 1/8" hole in the center.
By flat enough I mean take off as little metal as you can...just get the center flatened.
place the carburetor on a flat level surface.
Punch a locating mark in the center of the surface where the post goes.
Drill your hole atleast 3/16 or 1/4 " deep with the carburetor flat on the table and the drill bubble leveled.
Just a suggestion on the depth as you don't want to drill through the base metal into the body.
Screw in the screw and make sure you have about 3/8" or more of thread sticking up.
Cut off the head of the screw so that it is 3/8" high or atleast no higher than the shoulder of the other post.
Go slowly and deliberately on the cutting. Start by runing the saw backwards the entire length of the blade.
File the threads on the end of the stud you just made to a slight taper.
stand up the post head down on the table and punch it's center.
lay your flat sided pliers on the table and open them up enough to drop the post head down on the table.
Still holding the pliers flat on the table clamp down on the post and keep it that way.
Drill a hole 1/4" deep in the post but no deeper than it's shoulder and keep the drill level.
Screw the post down on the stud you made till it is at it's original height or as close as possible.
you also want the float pin to go straight through.
to accomplish this for certain put the pin in the repaired post and turn it till it points dirrectly at the other side.
Post's may have a little less room for the float between them now so you may need to modify the float.
If you file the float make sure you de-bur the hole so the pin rides smooth.
Good luck, your gonna need it.
Chris.Last edited by tkent02; 05-05-2012, 08:07 PM.
Comment
-
Forum LongTimerBard Award Winner
GSResource Superstar
Past Site Supporter- Jul 2005
- 15161
- Marysville, Michigan
Yes, it's easy to file!Originally posted by crazy5 View PostIs there a reason in particular that people say to use brass?
I used 1/8" brazing rod.
Comment
-
 crazy5
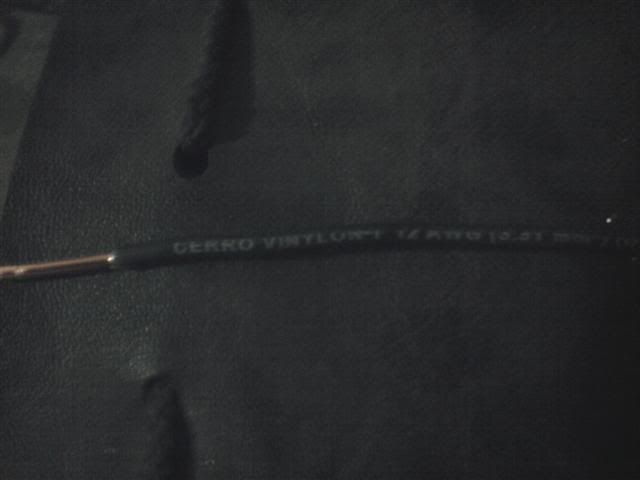
So, 12ga, solid-strand electrical wire turned out to be perfect. Nice cross between being sturdy enough to stay put, and soft enough to allow slight tweaking with pliers to get the post holes perfectly aligned.
No filing/turning needed... 12ga solid strand electrical wire fit perfectly in a 5/64" hole. A couple taps with a small plastic faced hammer set it in place, and it's not coming back out unless I intentionally pull it off with pliers.
I had read the procedure that tkent02 referenced, and while it seems like a good idea to me, it didn't seem like it would leave much room for adjustability if the posts didn't end up parallel. Plus, my posts were broken on an angle, and I didn't want to remove that much material to allow me to spin the post onto the screw.
By pressing it straight on, I didn't have to remove any material, and I was able to use the broken surfaces to help put the post back into it's original alignment.
The wire I used:

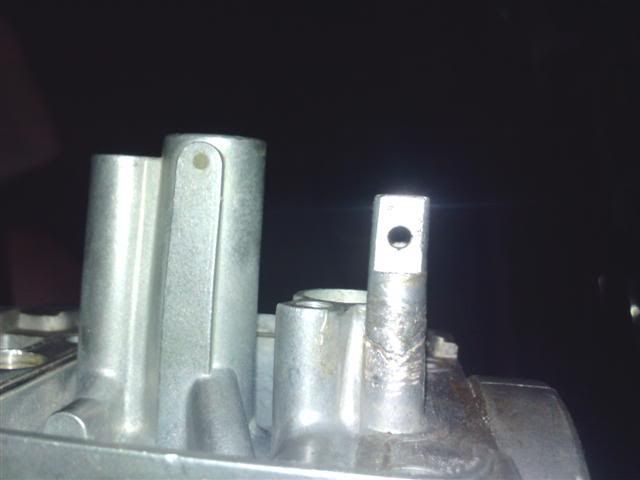
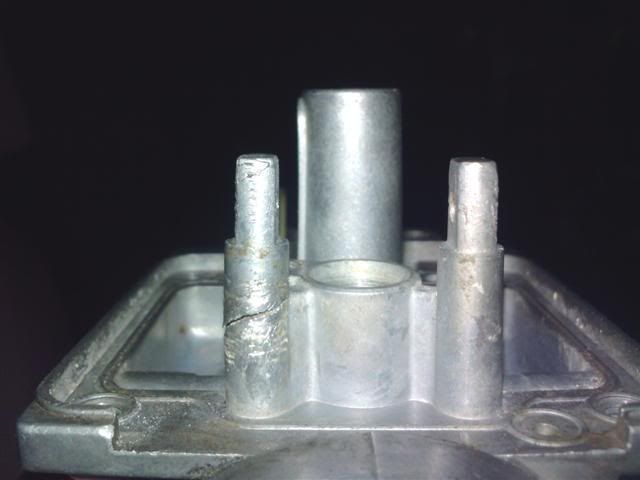
One of the fixed posts (you can see where the PO roughed it up for the failed epoxy fix):


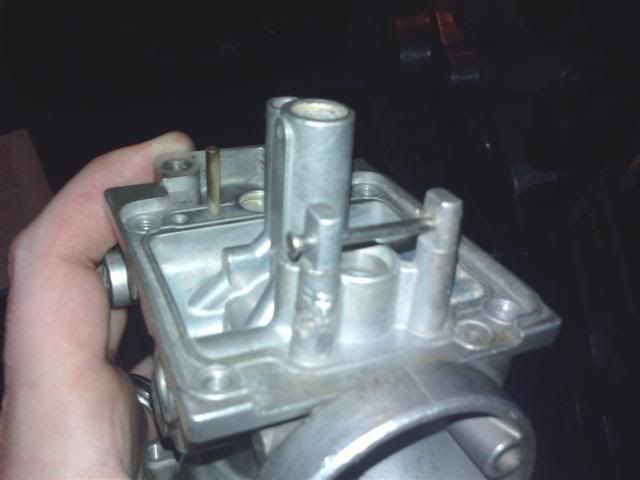
Perfect pin alignment (I didn't press it all the way in, since they're on their way into the carb dip):

I really hope this helps someone in the future... This fix cost me nothing but my time, was easy to do, and I have full confidence in its strength.Last edited by Guest; 05-05-2012, 11:05 PM.
Comment
-
 andtheacademics
.png)


Comment