.png "Powered by vBulletin")
Chris and I are patiently waiting on the answer from the doc. I know that doesn't take care of all life has been throwing at you lately, but it's a start.
-
You most likely wondered why I mentioned this back in post 626.Originally posted by Matchless View Post
Sorry to hear that, and don't ask me how I know!Comment
-
NO, I never wondered Andre, your comment came straight to mind and the blame fell squarely on your shoulders right there and then, you're a jinx.
Don't worry china, you will still have the nicest G in the country, you can call your sangoma off now.
Comment
-
Sorry about that is was not intentional!
Don't feel too bad I know someone who only got it right on the 3rd try!
Try walking the piston into the sleeve with a screwdriver in the gudgeon pin by wiggeling it sideways with minimal pressure from the cylinders and lots of oil. A torch and eyeballing it all the way around is a must.
At least you will have enough rings and scrapers in reserve now!
Hope it goes well
Comment
-
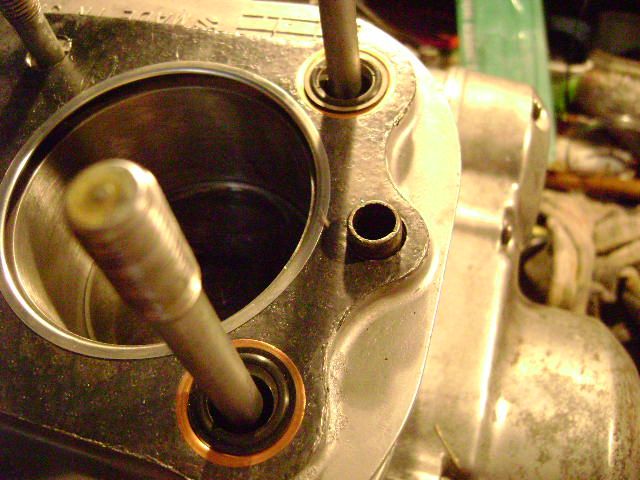
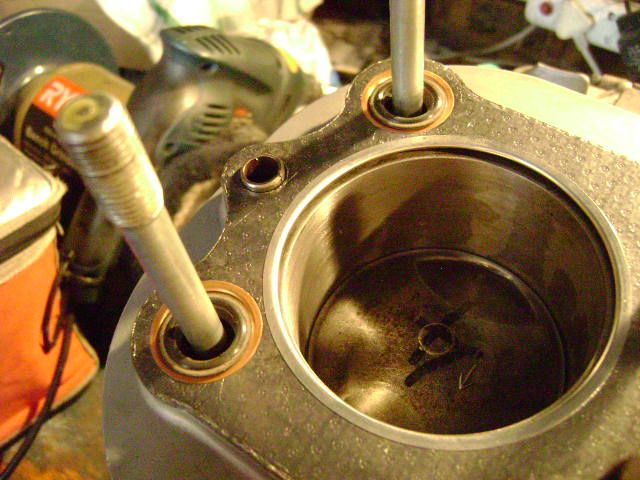
Ya I was using a small flat screw driver to guide the rings onto the bevel at the bottom of the cylinder, as I always do,
Now there is the problem, can't see.A torch and eyeballing it all the way around is a must.
In fact, if I am not mistaken it is the one cylinder I used a jubilee clamp on as a ring squeezer.
Phaaaa, no worries, will give it another go on Saturday and hopefully have the motor buttoned up by Sat night so I can get on with the tail piece and fairing on Sunday.Comment
-
Originally posted by Flyboy View Post
I would never use a screwdriver to poke rings in as a busted ring is likely, (on the cast ones anyway) significant point loading any place other than the end of the ring is likely to end in disaster. As Dale says popsicle sticks or my favourite on small motors, my fingers. Composite oil rings are a little different and likely be ok.
But that's just me, I not criticizing just saying...sigpic
Don't say can't, as anything is possible with time and effort, but, if you don't have time things get tougher and require more effort.Comment
-
Chris, me ain't got none popsicle sticks, but got lots of screwdrivers, so .....
Anyway, had a productive day and got the motor buttoned up.
replaced the buggered ring and dropped the barrels, using a screwdriver.
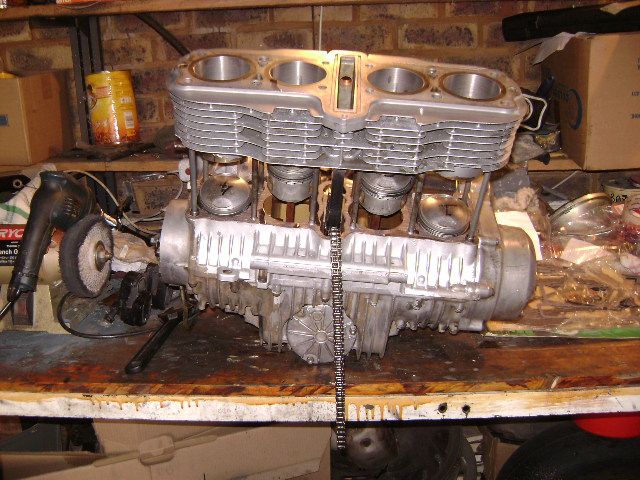
Pretty cylinders, hey, I think there is a song in there somewhere........lived in a GS, down by the crankshaft, everyone called them, pretty cylinders....
One more, just because I can....
Then dropped the head on
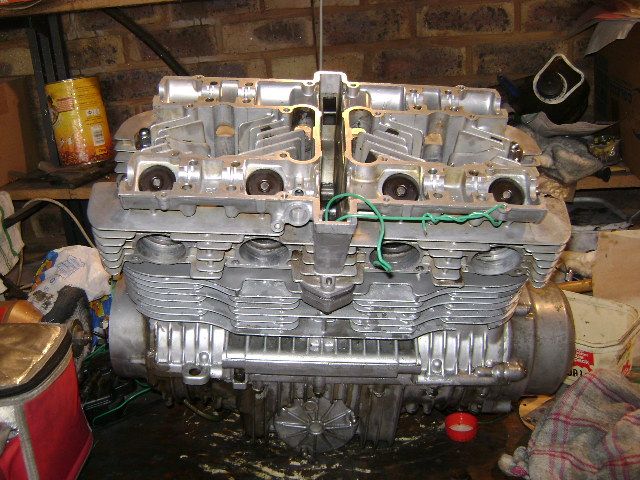
YES and YES
Comment
-
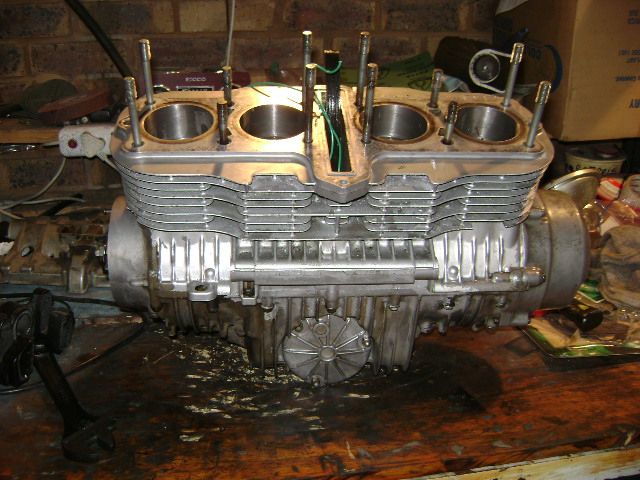
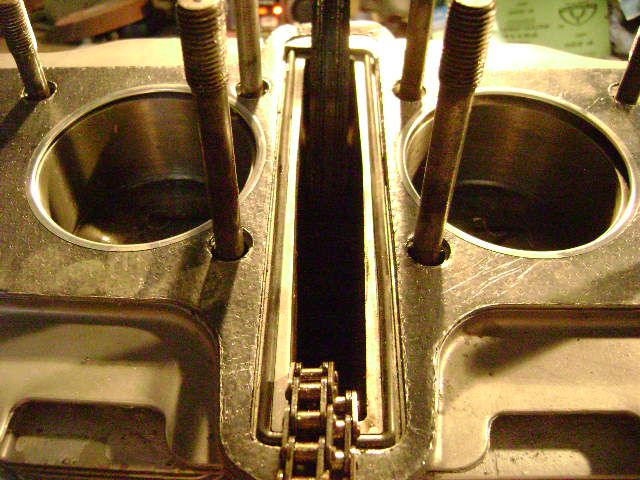
Dropped the cams in and measured the valve clearance.
Though while I have it open, might as well do a small tutorial, as the subject comes up ever so often.
Valve timing 101
NOTE: This applies to the GS1000 engine, other engines have slightly different variations, but the basic concept is the same.
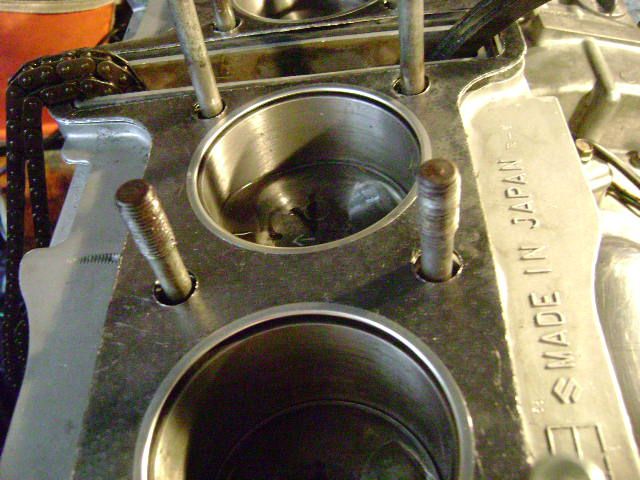
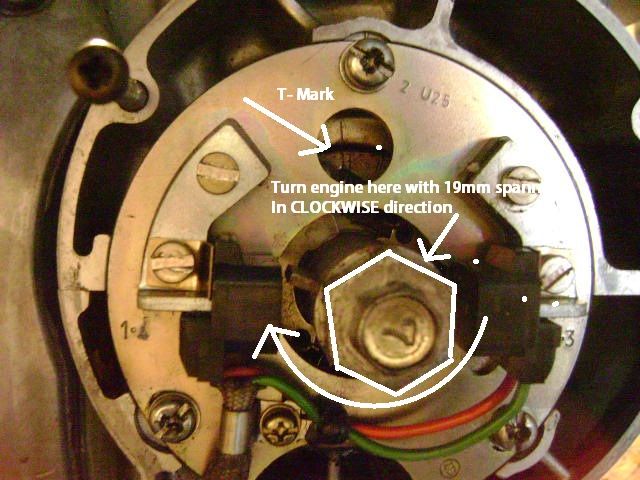
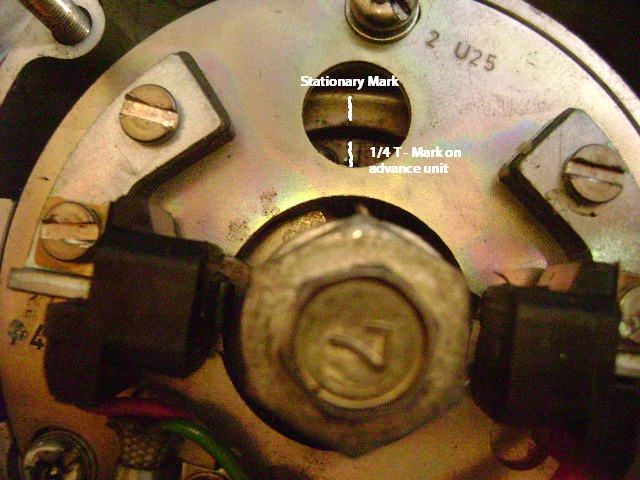
First thing we need to do is turn the engine over and get cylinders 1 qnd 4 to top dead center this is marked on the advance unit behind the ignition pick ups on the right hand side of the crankshaft.
I just put a screwdriver into the plug hole and turn it until it is at the very top, then fine tune by lining up the marks, it is marked 1/4 T, remember to turn the engine clockwise and keep tension on the timing chain to prevent it from bunching up in the crank case.
Ok, once we have our crankshaft mark lined up with pistons 1 & 4 at the op of their stroke, it is time to turn our attention to the exhaust camshaft.
The sprocket has two arrows, marked.....you guessed it, 1 & 2.
Rotate the camshaft so arrow 1 points straight ahead at the head casing and parallel to it.
This will leave arrow 2 pointing straight up, as they are 90 degrees apart.
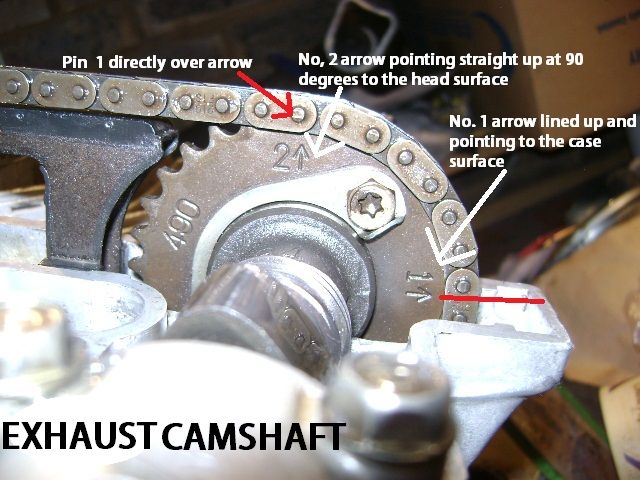
Make sure you remove all the slack from the chain between the crank and the exhaust camshaft (that is the run coming up the front of the engine, and lay the chain around the sprocket.
The pin lying directly over arrow 2 we will call pin 1.
Now the idea is to lay in your intake camshaft so that it's arrow, numbered 3, is pointing straight up, as arrow 2 is, and there should be 20 pins between arrow 2 and 3, including the pins over the arrows.
Rotate your intake cam until you have 20 pins arrow to arrow, remember to make sure there is no slack on the chain between the two camshafts.
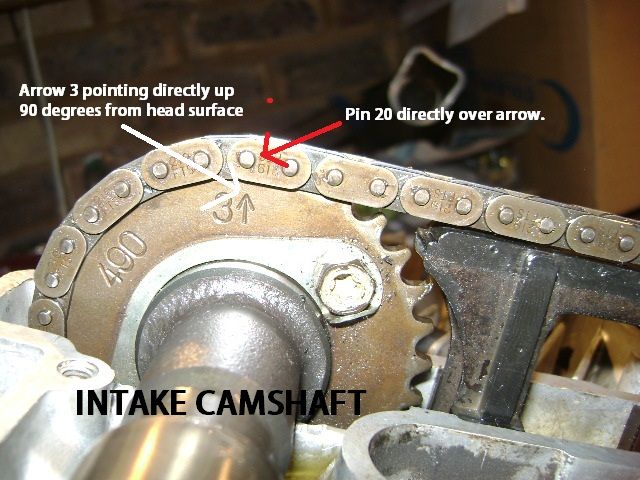
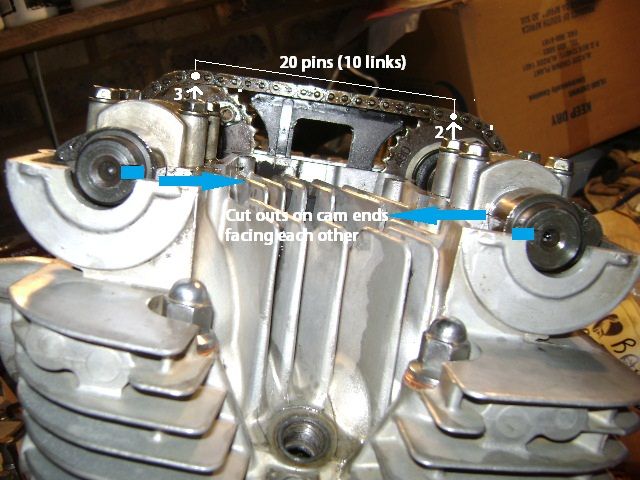
Each camshaft also has a cutaway on the end, when everything is lined up correctly, the two cutaways will be facing each other.
Easy peezy lemon squeezy.
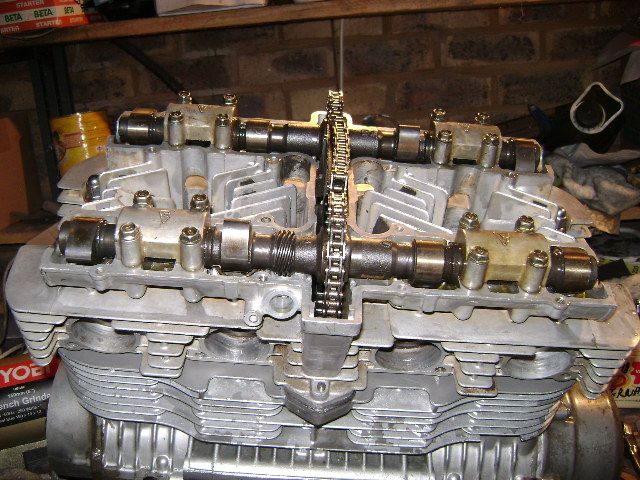
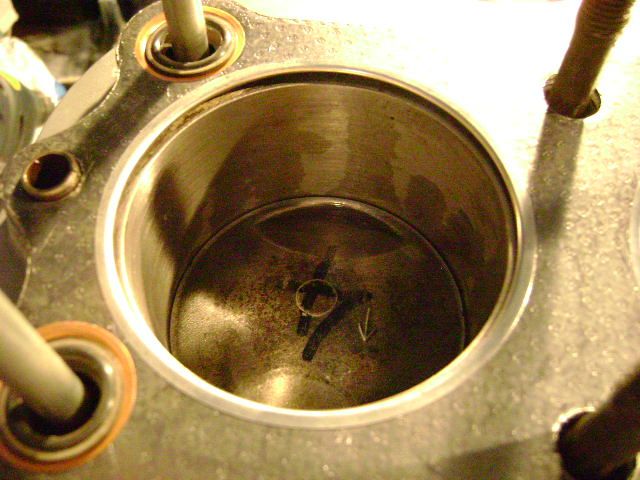
Then valve clearances were checked,
1 Int <0.04mm and shim won't turn
1 Exh 0.15mm
2 Int 0.09mm
2 Exh 0,06mm
3 Int 0.10mm
3 Exh 0.06mm
4 Int <0.04mm shim turns
4 Exh 0.04mm
So all in all not bad, considering I did lap the valves to clean up the seats and get them sealing properly again.
A bit of shuffling should see them all in spec.Comment
-
-
Looks great well done !!
Comment
-
She is beautiful and the center stand is proof of what she looked like before.Originally posted by Flyboy View Post
Good work Stan!
Comment
-
Looking great Stan.Cowboy Up or Quit. - Run Free Lou and Rest in Peace
1981 GS550T - My First
1981 GS550L - My Eldest Daughter's - Now Sold
2007 GSF1250SA Bandit - My touring bike
Sit tall in the saddle Hold your head up high
Keep your eyes fixed where the trail meets the sky and live like you ain't afraid to die
and don't be scared, just enjoy your ride - Chris Ledoux, "The Ride"Comment
-
That's encouraging!
cgsigpic
83 GS1100g
2006 Triumph Sprint ST 1050
Ohhhh!........Torque sweet Temptress.........always whispering.... a murmuring SirenComment
-
Wow Stan I haven't logged in for ages and what do I find? Jennifer with a heart and some clothes!
1982 GS450E - The Wee Beastie
1984 GSX750S Katana 7/11 - Kit Kat - BOTM May 2020
sigpic
450 Refresh thread: https://www.thegsresources.com/_foru...-GS450-Refresh
Katana 7/11 thread: http://www.thegsresources.com/_forum...84-Katana-7-11Comment
-


Comment