Announcement
Collapse
No announcement yet.
Project Windjammer
Collapse
X
-
 Matchless
 -
 Matchless
 -
 Matchless
 -
 spyug
spyug
You sir are another font of knowledge and I thank you for sharing. I was not aware of acetone as a product for working with ABS and this opens up a whole slew of possibilities for repairing and fabricating.
I have done a fair bit of "fiddling" with ABS sheet and have "drape" formed a few pieces, I always had trouble gluing the stuff, especially when attaching mounting tabs and the like. I had found that ABS pipe cement worked somewhat but often let go over time.
The idea of making a paste is a great idea for plugging some holes and cracks. I like the idea that it will bond structurally with the piece being repaired. Again, other products like epoxy or bondo tend to come free after time and or if the part flexes.
Good luck with the "rebuild" I'm following with eager anticipation.
Cheers,
Spyug.
Comment
-
 Matchless
Comment
-
 Matchless
 -
 Matchless
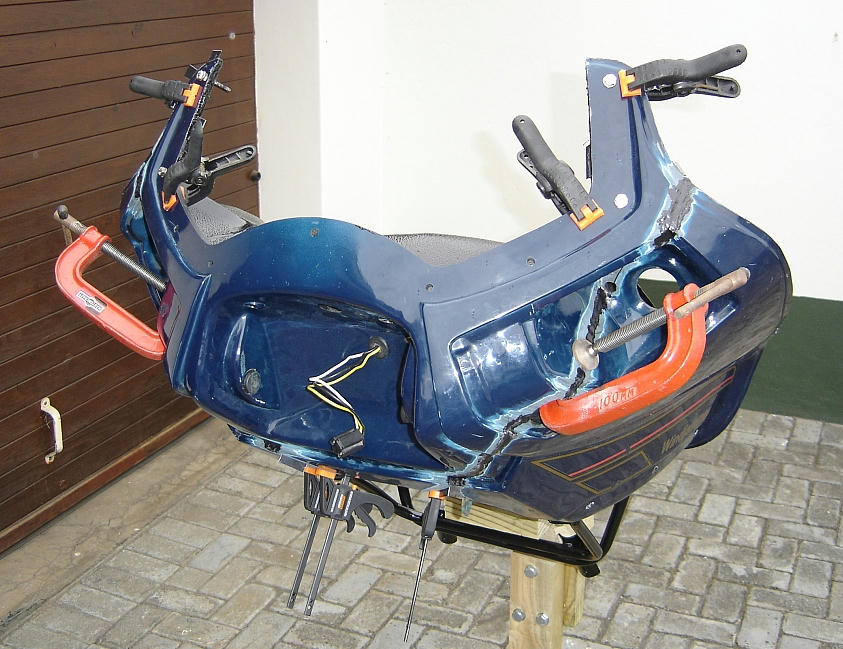
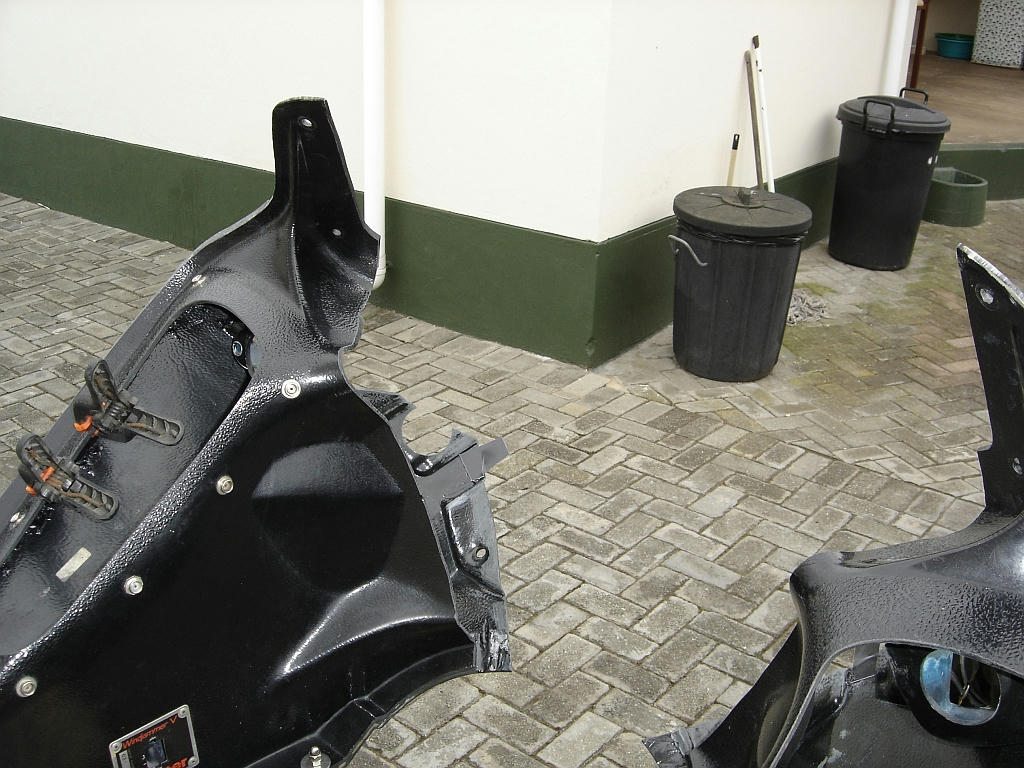
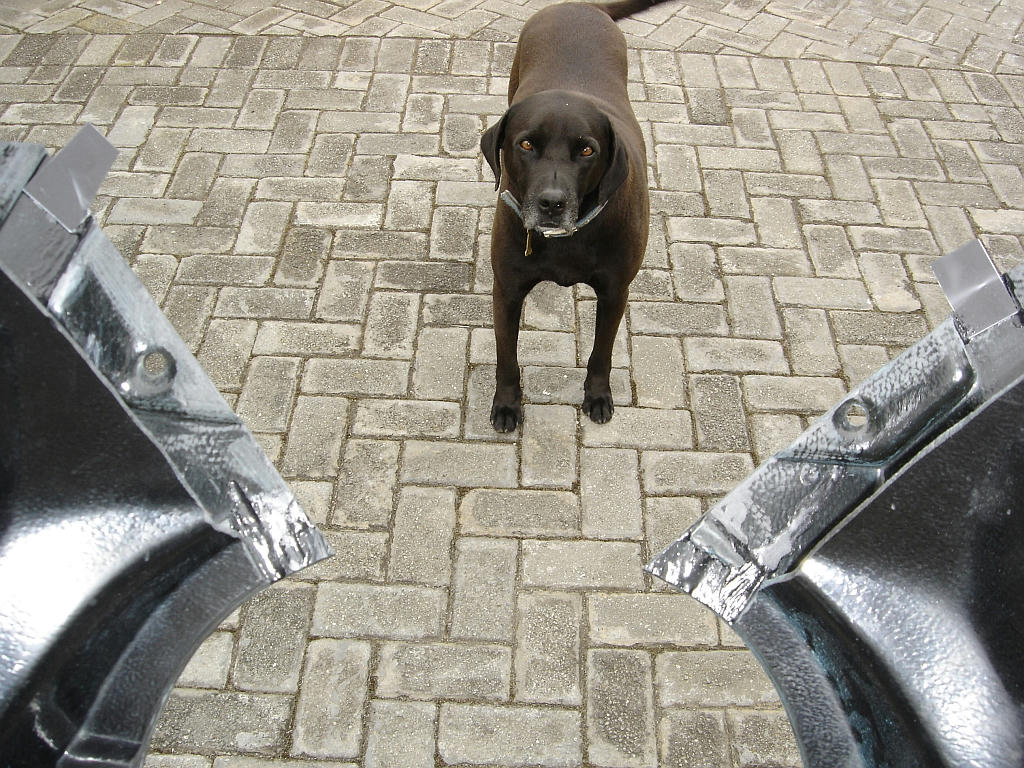
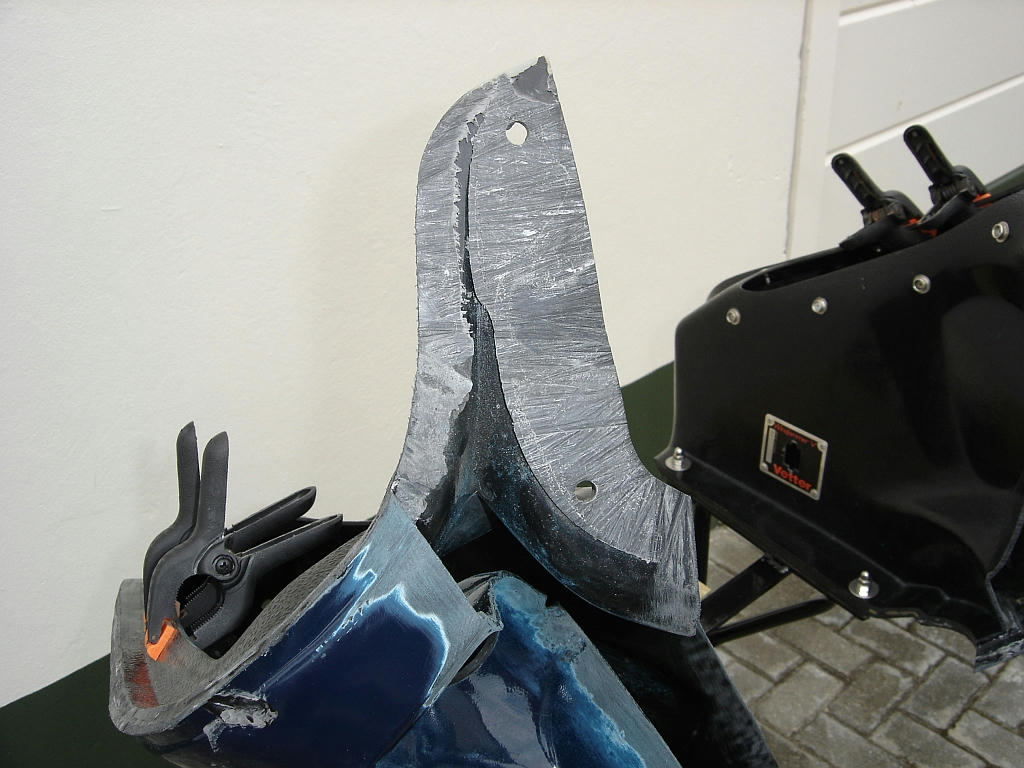
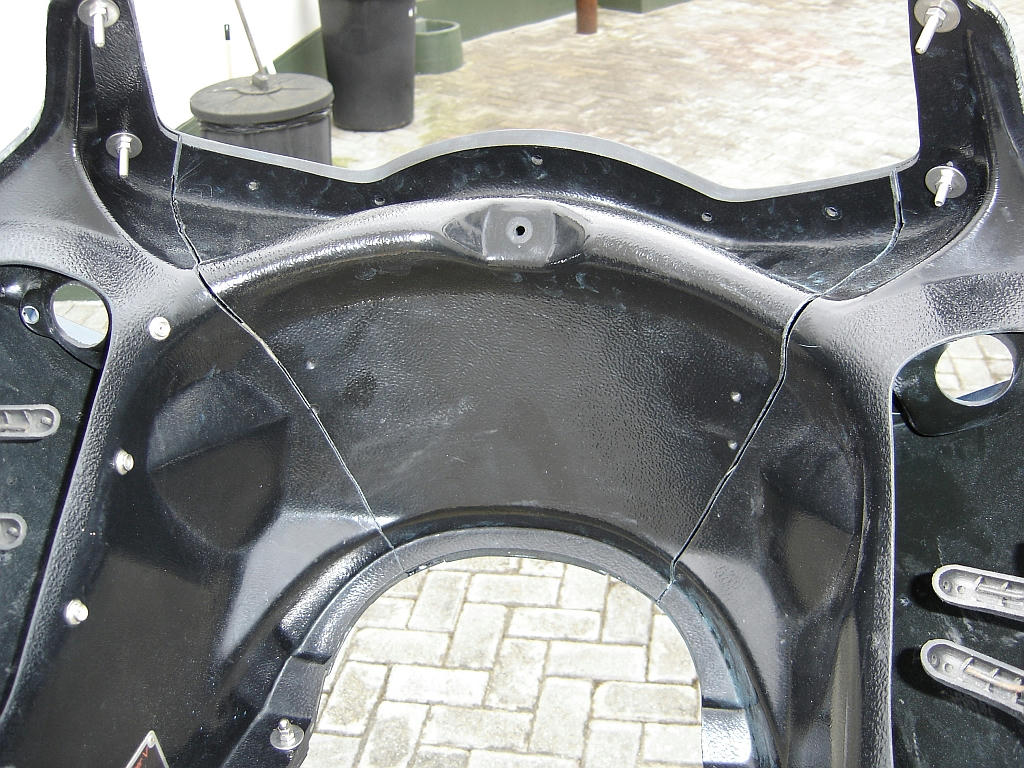
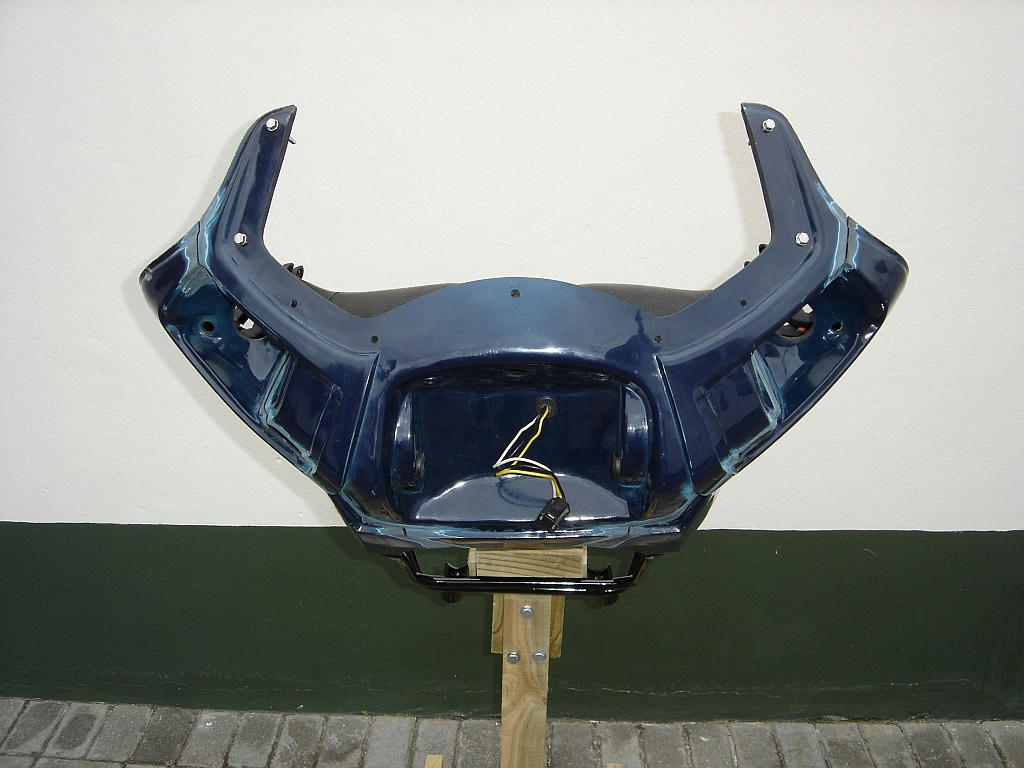
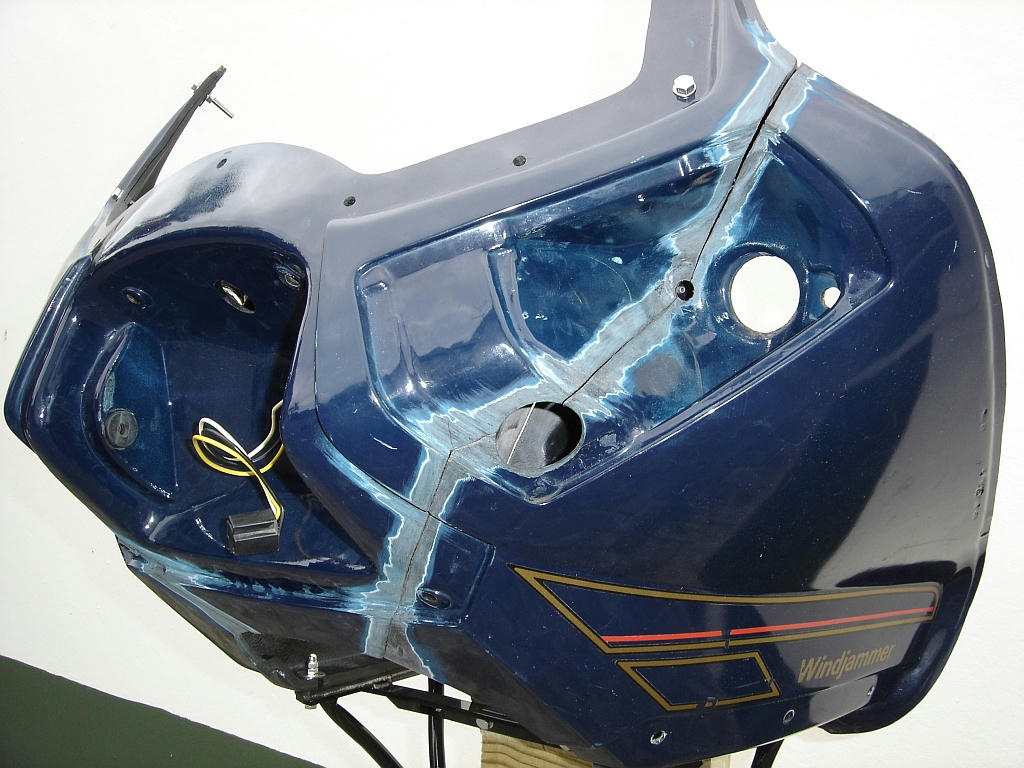
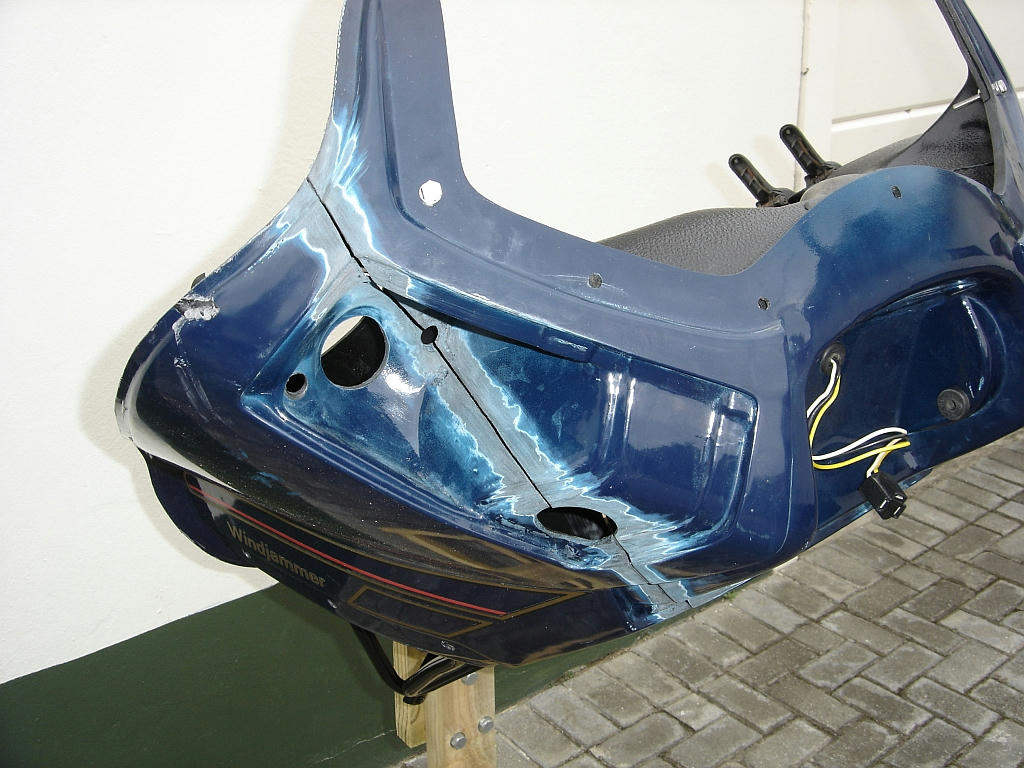
As you will see Rustybronco cut the fairing in strategic places to hide the join under the flashers, with the inner and outer cuts offset, to retain integrity. He also separated the windshield "ears" as well as a bit on the lower side which is then overlapped and bonded together and allows for much easier alignment of the parts.
The cut apart windshield ears were layered with ABS slurry as well as the bottom corners. Then using a multitude of clamps and the bolts through the windshield mounting holes, everything was aligned properly. Small bits of ABS plastic sheeting was used to keep the hacksaw cut gap evenly apart.
Short plastic bridging strips were prepared while the pieces were apart by heating with a heat gun and forming to follow the inner cut line. These will be glued in place over the cut joint by working through the cubby holes.
Comment
-
 Matchless
The status as of today when I stopped for the day:
The inside of the cuts have strips of ABS sheet glued lengthwise covering the cut line and held in place with bundled shop rags insie the cubby holes.
Some of the cuts have been partially filled with ABS slurry.
This will stand for the next 3 to 4 days to allow the acetone to evaporate and the ABS bond to be strong enough for handling before any further bonding will be done:
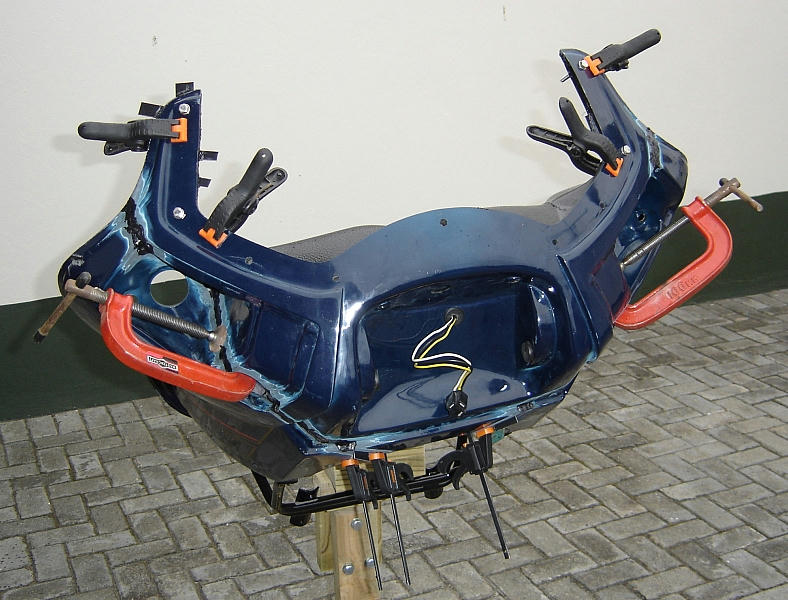
The G clamps through the horn hole behind the flasher grill hold the inner bridging glued strip and aligns the parts as well.
Comment
-
Forum LongTimerBard Award Winner
GSResource Superstar
Past Site Supporter- Jul 2005
- 15153
- Marysville, Michigan
I see you have re-painted the fairing bracket; it looks very nice as per your usual style.
now for the big question... is Georgie mad at Me for helping with this project? Last edited by rustybronco; 12-15-2010, 01:03 PM.
Comment
-
 Tim Tom
Not a Windjammer fan per say... But I love watching you put this one back together!!!
Looks great and I can't wait to see the finished project. Keep it up
Comment
-
 Matchless
I messed up the excellent paintwork on it when I used the gentle persuader to straighten out the slight bend it had and thought I had to stop it rusting.Originally posted by rustybroncoI see you have re-painted the fairing bracket; it looks very nice as per your usual style.
now for the big question... is Georgie mad at Me for helping with this project?
Georgie is in his element, as I am spending much more time in his domain (territory). I am sure he smelt your dogs when I unpacked the parts, as he sniffed at them from all sides! I told him this was from his cousins on the other side of the world!
Comment
-
 Matchless
You will be quite surprised at the strength when using acetone only to join ABS. Holes and cracks fill out very nicely and can be sanded easily as well. The slurry can be a real lifesaver and is cost effective!Originally posted by spyug View PostI was not aware of acetone as a product for working with ABS and this opens up a whole slew of possibilities for repairing and fabricating.
Spyug.
I have seen a writeup on how someone built a boat with ABS sheeting and welded all the joints with acetone. He used thin ABS sheet and just doubled up or trebled up the thickness by acetone-ing the sheets together! An eyedropper was his tool for applying the acetone and then just let it wick into the joints.
Glad it can help you!
Comment
-
Well this has been quite the undertaking. I remember volunteering the fairing back some months ago. Glad to see it will be used. It had followed me around for a few years. I will be very interested in seeing the thing actually on the bike repainted and up and running. Hope the radio housing and radio suit your needs as well..best wishes, Chuck.Last edited by chuck hahn; 03-05-2018, 05:41 PM.MY BIKES..1977 GS 750 B, 1978 GS 1000 C (X2)
1978 GS 1000 E, 1979 GS 1000 S, 1973 Yamaha TX 750, 1977 Kawasaki KZ 650B1, 1975 Honda GL1000 Goldwing, 1983 CB 650SC Nighthawk, 1972 Honda CB 350K4, 74 Honda CB550
NEVER SNEAK UP ON A SLEEPING DOG..NOT EVEN YOUR OWN.
I would rather trust my bike to a "QUACK" that KNOWS how to fix it rather than a book worm that THINKS HE KNOWS how to fix it.
Comment
-
 Matchless
Chuck,Originally posted by chuck hahn View PostWell this has been quite the undertaking. I remember volunteering the fairing back some months ago. Glad to see it will be used. It had followed me around for a few years. I will be very interested in seeing the thing actually on the bike repainted and up and running. Hope the radio housing and radio suit your needs as well..beat wishes, Chuck.
I am glad you have seen the progress on it to date. If it was not for you this would never have been possible!
I am really enjoying resurrecting it!
I am sure that radio and the pod is going to really make it into a winner!
All I can say is, thank you, once again!
Keep well.
Comment
-
It looked so much nicer in my storage unit though..all nice paint and no surgery scars!! LOL. Enjoy and keep the pics coming,,i will check them out often.MY BIKES..1977 GS 750 B, 1978 GS 1000 C (X2)
1978 GS 1000 E, 1979 GS 1000 S, 1973 Yamaha TX 750, 1977 Kawasaki KZ 650B1, 1975 Honda GL1000 Goldwing, 1983 CB 650SC Nighthawk, 1972 Honda CB 350K4, 74 Honda CB550
NEVER SNEAK UP ON A SLEEPING DOG..NOT EVEN YOUR OWN.
I would rather trust my bike to a "QUACK" that KNOWS how to fix it rather than a book worm that THINKS HE KNOWS how to fix it.
Comment
.png)

Comment