• Required reading for all forum users!!!

    Welcome!
    Register to access the full functionality of the GSResources forum. Until you register and activate your account you will not have full forum access, nor will you be able to post or reply to messages.

    A note to new registrants...
    All new forum registrations must be activated via email before you have full access to the forum.

    A Special Note about Email accounts!
    DO NOT SIGN UP USING hotmail, outlook, gmx, sbcglobal, att, bellsouth or email.com. They delete our forum signup emails.

    A note to old forum members...
    I receive numerous requests from people who can no longer log in because their accounts were deleted. As mentioned in the forum FAQ, user accounts are deleted if you haven't logged in for the past 6 months. If you can't log in, then create a new forum account. If you don't get an error message, then check your email account for an activation message. If you get a message stating that the email address is already in use, then your account still exists so follow the instructions in the forum FAQ for resetting your password.

    Have you forgotten your password or have a new email address? Then read the forum FAQ for details on how to reset it.

    Any email requests for "can't log in anymore" problems or "lost my password" problems will be deleted. Read the forum FAQ and follow the instructions there - that's what we have one for...

  • Returning Visitors

    If you are a returning visitor who never received your confirmation email, then odds are your email provider is blockinig emails from our server. The only thing that can be done to get around this is you will have to try creating another forum account using an email address from another domain.

    If you are a returning visitor to the forum and can't log in using your old forum name and password but used to be able to then chances are your account is deleted. Purges of the databases are done regularly. You will have to create a new forum account and you should be all set.

Rule #11

  • Thread starter Thread starter andtheacademics
  • Start date Start date
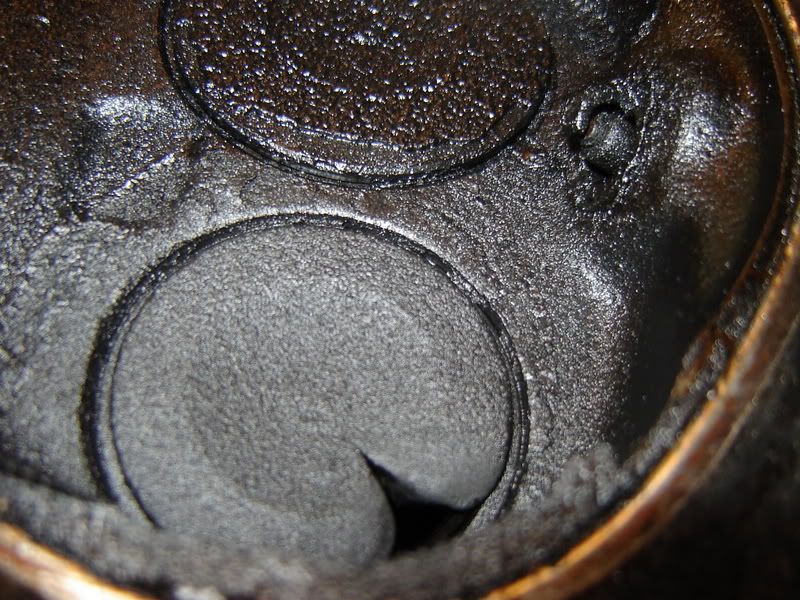
You aren't spinning that motor without oil in the crankcase though. Right?

Hand turning the crank without oil will not harm the engine in the least

You can run the motor for at least 5 miles without any oil in it (AMHIK)
 
Alright - well I've done the carb clean/ oil + filter change. I set my air screws @ 1-1/4 turn and my fuel pilots at 1 turn. Sat the bike on the trickle charger annndd! Nothing - now she won't even come close to catching on! Doesn't my motorcycle KNOW how hard I've been working? Just turn on already! What is your problem Betty?!

Here's a little picture of the carb innards:
tumblr_m3h6vp3q4b1rv97qxo4_1280.jpg


Here's a picture of the plugs 1-4 left to right (As I mentioned #4 had a pilot screw out three turns!)
tumblr_m3h6vp3q4b1rv97qxo8_1280.jpg


Here's the bike in the driveway (It's an instagram photo, intentionally blurry)
tumblr_m3h6vp3q4b1rv97qxo7_1280.jpg


AND if your interested in a laugh - here's my two-video petcock test series. Video evidence that I am, in fact, a bit dense.
Petcock Test #1 | Petcock Test #2
[if you consider three minutes of your life valuable, maybe don't bother!]

You can see a few other pictures of the clean up on my blog @ http://ramblam.tumblr.com/

I set my floats at 24mm I'm getting drip from #3 still, should I raise them to 26mm or wait till I get it running?

Should I change the spark plugs? (After I cranked the starter for a minute the plugs are WET so that leads me to believe I'm getting no spark? or bad compression? Could the engine still be mad at me for having gas in the oil? What is the next step in getting this b!tch turned on?
 
New plugs are cheap and worth doing, but you should at least give those plugs a good scrubbing and clean off the carbon with some carb spray.

When you first install the carbs, it can take a bit of prodding to get her started sometimes. It's hard to get the idle screw turned to the right spot to start. Too far out and she won't have enough throttle opening to start. Too far in and she will leap to 3,000 RPM because the idle is too high. I start at about 2 turns out from closed and turn the idle screw in a bit if it won't start at first, to try and ease into the right spot.

When I have trouble starting after a rebuild, I usually fiddle with choke and idle screw to see if that helps. After a couple tries, I let the bike sit a few minutes to ease off the battery, check things out and make sure that gas isn't building up in the cylinder such that it will start with a BANG.

Do you have a float measuring tool? Setting the floats with the caliper is good, but using a gauge helps confirm where the float levels actually sit. If you are dripping from a carb, it could be the float is too high, or a slow leak into the bowl. The level gauge will help figure out the height. You can also pull the rack, remove the bowl from the offending carb, and run some fuel through the line. Watch how the gas flows out from the "bottomless" carb and use your finger to lift the float gently until the fuel stops. If you see fuel continue to flow or drip/dribble from the carb, you have a fuel source that is bypassing the needle, and overloading that carb.

To check for spark, just pull the leads off all four cylinders and remove one of the plugs. Reconnect the lead to that plug and ground it to the outside of the engine block. You can let it rest on the head (but away from the plug hole just in case), or hold it against a grounding point on the head or the frame (insulate your hand). Then turn on the ignition and hit the starter to see if the plug sparks. If so, switch leads and repeat to check the other cylinders.

Spark failures usually in pairs because each coil powers 2 cylinders. If one cylinder gets no spark, then that plug or lead has a problem (fouling, bad wire or connection). If 2 cylinders fail (either 1 and 4 or 2 and 3), then you should explore the coil and/or ignition points etc. for that pair. If a mismatched pair fails (1 and 2) or (3 and 4), that's probably two individual problems in the leads or plugs. If all the plugs fail, then you probably have a broader power issue -- e.g., a weak battery, bad power connections to the coils (rather than from the coils), etc.

The wiring path for these bikes has some goofy routing. A lot of people like to use a relay to shorten the electrical path for the coils. The stock layout runs current through the handlebar switches and back to the coils. A coil relay sets up a shorter path that still responds to the kill switch but delivers stronger voltage to the coils for ignition. There are several guides on coil relays here and on BassCliff's site, and adding one to your bike is dead easy to do. Takes about $10 in materials and 20 minutes to set up.

HTH

Edit: Is that a fuel filter in the picture? You have a filter in the petcock and inline filters frequently bog down and cause fuel starvation issues. These bikes don't have fuel pumps and your fuel system may not be able to overcome the resistance of an inline filter.

tumblr_m3h6vp3q4b1rv97qxo2_1280.jpg
 
Last edited:
MC - THANK YOU!

Is that a fuel filter in the picture? You have a filter in the petcock and inline filters frequently bog down and cause fuel starvation issues. These bikes don't have fuel pumps and your fuel system may not be able to overcome the resistance of an inline filter.

I was wondering if that little bugger was supposed to be there... whenever i hit the start button and the engine starts to crank the filter makes a sound like someone sucking up the very last bit of soda through a straw. Maybe it wasn't so restricting with several pounds of gas in the other end of the line? but a few ounces in a funnel...

I'm back to Betty tomorrow & Sunday so I'll get some more info & pictures then...

EDIT: I'm making a buy-list (I don't think I can afford the valve adjustment just yet b/c the shim kit is $140) but does anyone know where I can buy the tappet depressor tool? I searched "tappet" on Z1 and was returned zilch.
 
Last edited:
Hi,

Check the "Services" section of the forum. There is a Shim Club that trades shims. Z1 sells individual shims for less than $6 each, no need to buy a whole kit (which probably contains many sizes you can't use anyway).

Z1 also sells the tappet tool. Just click the picture.


Thank you for your indulgence,

BassCliff
 
if you do want to run a filter, you have to make sure that it is a low pressure filter. A lot of filters are for fuel injected lines and won't flow without pressure behind them. I hope things get sorted out. I am enjoying this write up though.

Also, as was mentioned, did you check the kill switch? It's something that pretty well everyone has done at one time or another. I hit it when I went to take my test for my license........ (we do them on the road here in Maine and the instructor follows in their car and beeps at you to tell you what to do) Anyway, he just went with someone else and I took mine after that. I lied and told him that the ignition must have been acting up... lol

So give a once over to your electrical connections since it's easy to pull something apart and not notice it. And check your kill switch.

You mentioned that your turn signal switch isn't working right. You can just replace it pretty easily. I got an almost brand new set of controls from a Suzuki Bandit off E-bay for $10 or something ridiculously cheap like that. They have a little plastic nub that needs to be cut off (or a corresponding hole drilled into the bars. The nub is there to keep them from twisting although I have not had any issues without it) and I think I had to cut the original plugs off and wire those onto my new controls. The plug from the end that is in the headlight. It was really easy, all the wires matched up because I got it from another Suzuki. It works beautifully too since they are pretty well brand new. I hope this helps. A lot of people are against it and keep saying to use stock ones, but that is ignorant. The 30+ year old ones were not great to begin with and time hasn't helped. Do yourself a favor and consider this. It will be cheaper and better (but not easier since you will need to wire up the original plug onto the new one).
 
I set my air screws @ 1-1/4 turn and my fuel pilots at 1 turn.

Generally as a starting point the fuel screw is opened half as far as the air screw. Just a preliminary seeing of course, it will need to be fine tuned once it's running.
 
Hi,

Check the "Services" section of the forum. There is a Shim Club that trades shims. Z1 sells individual shims for less than $6 each, no need to buy a whole kit (which probably contains many sizes you can't use anyway).

Z1 also sells the tappet tool. Just click the picture.


Thank you for your indulgence,

BassCliff

Doesn't this mean I'll have to first feel out the shims and then sit around and wait for the correct ones to arrive? Or do you guys all put the bike back together and continue to ride uncalibrated?

I'm starting to think I should have just bought one of these...
micro_scooter_bullet_1.jpg

...They have a little rattle at the top end, but if you install some improved fork dampeners it usually takes care of it.

Also, just found the "For Sale" section of this forum, which is only added proof that I paid about triple what this bike is actually worth! @%$&!
 
Generally as a starting point the fuel screw is opened half as far as the air screw. Just a preliminary seeing of course, it will need to be fine tuned once it's running.

Noob question - how do you turn the fuel screws with the bike running? Do i have to buy a tiny screwdriver and a dentists mirror?

Also - no springs on my fuel pilots - problem??
 
Noob question - how do you turn the fuel screws with the bike running? Do i have to buy a tiny screwdriver and a dentists mirror?

Tiny screwdriver, yes, mirror, no. You can do it by braille. Wear a thin glove, that engine gets hot. I use a short screwdriver tip for a drill, stuck in a 1/4" socket as my screwdriver.

(I think it's 1/4, whatever size fits it)


Also - no springs on my fuel pilots - problem??

Yes, there should be springs like the ones on the air screws, only smaller.


Or do you guys all put the bike back together and continue to ride uncalibrated?

I do this, unless one is too far out of spec to be safe.
 
Last edited:
Bic makes some close enough in diameter.
Might have to loosen or tighten them up just a tad. Can't remember which.
 
Hi,

Doesn't this mean I'll have to first feel out the shims and then sit around and wait for the correct ones to arrive? Or do you guys all put the bike back together and continue to ride uncalibrated?

That's up to you. I think the shim club (Ray) will send out the necessary shims in advance with a promise that you return the ones you no longer need, one for one.

Getting the valves in spec the first time seems to always take the longest. Once they are in spec, and you know the current clearances and shim sizes, it will be quicker the next time because, with a little forethought, you can have the shims needed for your next check already on hand.

Since I have inventoried my shims and clearances, keeping a record in Steve's handy-dandy spreadsheet, I can "guess-timate" what shims I might need at my next valve check and order ahead. I now have a small collection of shims that should keep me running for the next few years.

You'll find a shim worksheet on my website. Send Steve an email to get a copy of his service spreadsheet.

Thank you for your indulgence,

BassCliff
 
I can "guess-timate" what shims I might need at my next valve check and order ahead. I now have a small collection of shims that should keep me running for the next few years.

Again, psychic powers appear to prevail...

But the first time is the hardest - so I have to go through the process (measure clearances, pull out what shims are existing there already, calculate what I need to replace them with for correct clearances) Contact Mr. Ray, Esq. get supplement shims, and then send Mr. Ray, Esq. 'spent' shims... I may be better served to buy the first eight or so - that way I can begin building a back stock like Mr. BassCliff...?

Now - this might seem obvious to you pros, but you are in fact measuring the distance between the underside of the LOBE and the SHIM with a FEELER GAUGE? And you want there to be some room for play to reduce friction/ resistance on the camshafts?

And, out of curiosity does anyone know of a clear fuel line? They guy at the hardware store said they don't exist and the tubing he sold me can only have gas in it for a short while before it disintegrates....
 
Last edited:
Hi,

cam-valveschematic.gif


Have you gone through the guide?

Valve Adjustments (8 Valve)

I would also suggest getting a true metric feeler gauge and not an SAE gauge with equivalents on the back. As for my "psychic powers", if most of my clearances are at .07mm-.09mm but then I have a couple that are .04mm-.05mm then I will order replacements for those shims (the next size smaller) ahead of time. Once you've gone completely through the procedure once or twice you will realize how simple it is. I promise. :)

If you'd like to just buy one size smaller for each of the shims you have, I guess that would be a good place to start. Keep in mind that valve clearances tend to get smaller over time so the larger sizes will eventually become unusable.

Clear fuel line: http://www.z1enterprises.com/detail.aspx?ID=297


Thank you for your indulgence,

BassCliff
 
Last edited:
Again, psychic powers appear to prevail...
No psychic powers needed, they will generally wear tighter, needing the next size thinner shim. If you know what is there now, and which valves are getting close to the limit, you know what will be needed next. Steve's spreadsheet is great for this.


And you want there to be some room for play to reduce friction/ resistance on the camshafts?

This isn't it, although if there were no gap at all, the oil would be wiped off the cam and there would be wear problems...

The valves only cool themselves by contact with the valve seat... If the adjustment is too tight it doesn't really contact the seat as it should, so the valve starts to get hot. With the heat the valve expands, it becomes longer. Now it closes even less, and contacts the seat even less, getting even hotter. Vicious circle, heat causes less contact, less contact causes more heat. Eventually it gets so little contact with the seat, that it can't cool at all, gets hotter and hotter, and finally some metal burns away from the edge of the valve. Now flames are squeezing through the this gap in the valve, giving the valve even more heat. Soon the nice round valve head looks like a pizza with a piece missing, the engine can no longer run on that cylinder, and you have a lot of expensive work to do.
Like this:
DSC01106.jpg


And, out of curiosity does anyone know of a clear fuel line? They guy at the hardware store said they don't exist and the tubing he sold me can only have gas in it for a short while before it disintegrates....
Bike shops used to have it, can't find it lately.
 
Last edited:
You can get 1/4 inch clear line from Z1 for a buck a foot. It is tight on the petcock and fuel tee, but works fine.

You can also try buying one or two shims from your local bike shop. I get them for $5 each from a place nearby. Buy a single shim on the thin side - maybe 2.50. Then you have a spare placeholder, allowing you to swap shims across your valves to the extent you can trade a big clearance for a small one. Then go back to the bike place and buy the shims you need to finish out.

When I first did the valves on my bike I only needed to buy like two shims
 
The valves only cool themselves by contact with the valve seat... If the adjustment is too tight it doesn't really contact the seat as it should, so the valve starts to get hot. With the heat the valve expands, it becomes longer. Now it closes even less, and contacts the seat even less, getting even hotter. Vicious circle, heat causes less contact, less contact causes more heat. Eventually it gets so little contact with the seat, that it can't cool at all, gets hotter and hotter, and finally some metal burns away from the edge of the valve. Now flames are squeezing through the this gap in the valve, giving the valve even more heat. Soon the nice round valve head looks like a pizza with a piece missing, the engine can no longer run on that cylinder, and you have a lot of expensive work to do.

EUREKA! NOW I GET IT! So if everyone in agreement that the shims on these engines are consistently needing to be replaced by thinnner and thinner ones, wouldn't that lead you to assume the valves are getting longer over time? Meaning you eventually have to replace your valves all together?

When someone says "Rebuilt Engine," That is the type of work I had assumed they are doing... I guess it takes making that mistake once to learn that lesson!

Thanks again everyone for the (continued) help and explanations! This forum really is an invaluable resource, once I finish filling the hole in my bike with money, I'll be sure to send some to the administrators!
 
You can get 1/4 inch clear line at ANY hardware store, and most auto-parts stores. Check lawn-and-garden by the lawnmowers/oil/filters/etc...
 
Back
Top