• Required reading for all forum users!!!

    Welcome!
    Register to access the full functionality of the GSResources forum. Until you register and activate your account you will not have full forum access, nor will you be able to post or reply to messages.

    A note to new registrants...
    All new forum registrations must be activated via email before you have full access to the forum.

    A Special Note about Email accounts!
    DO NOT SIGN UP USING hotmail, outlook, gmx, sbcglobal, att, bellsouth or email.com. They delete our forum signup emails.

    A note to old forum members...
    I receive numerous requests from people who can no longer log in because their accounts were deleted. As mentioned in the forum FAQ, user accounts are deleted if you haven't logged in for the past 6 months. If you can't log in, then create a new forum account. If you don't get an error message, then check your email account for an activation message. If you get a message stating that the email address is already in use, then your account still exists so follow the instructions in the forum FAQ for resetting your password.

    Have you forgotten your password or have a new email address? Then read the forum FAQ for details on how to reset it.

    Any email requests for "can't log in anymore" problems or "lost my password" problems will be deleted. Read the forum FAQ and follow the instructions there - that's what we have one for...

  • Returning Visitors

    If you are a returning visitor who never received your confirmation email, then odds are your email provider is blockinig emails from our server. The only thing that can be done to get around this is you will have to try creating another forum account using an email address from another domain.

    If you are a returning visitor to the forum and can't log in using your old forum name and password but used to be able to then chances are your account is deleted. Purges of the databases are done regularly. You will have to create a new forum account and you should be all set.

GS450 Cafe / Fighter Style

  • Thread starter Thread starter Collo
  • Start date Start date
C

Collo

Guest
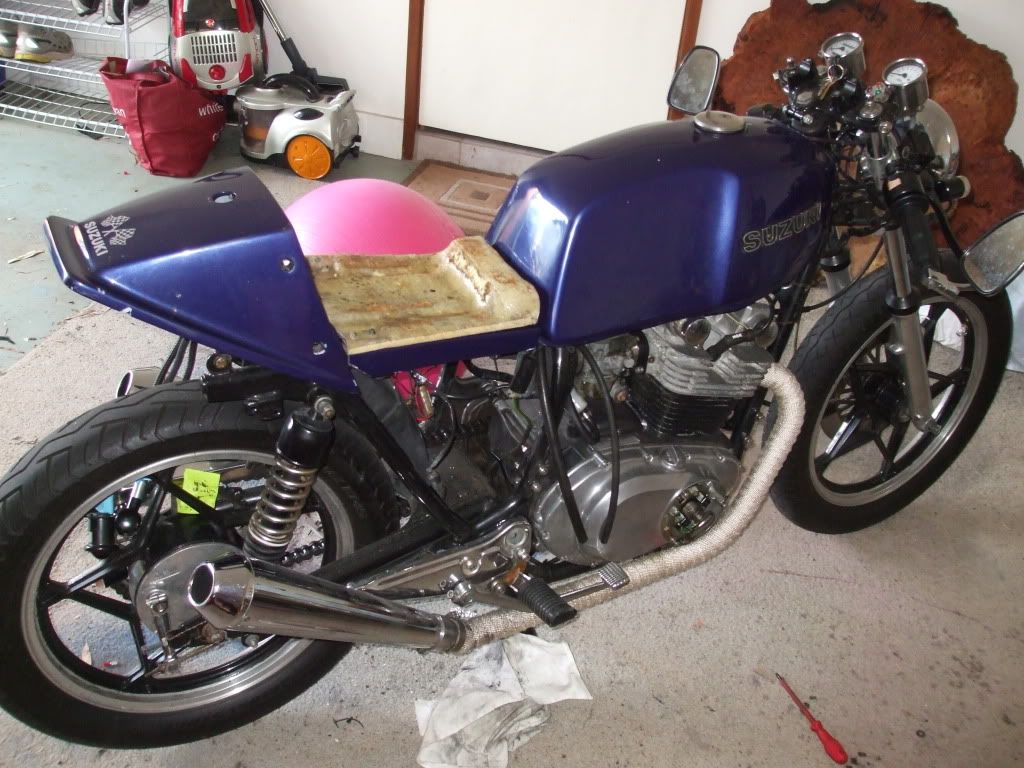
Hi all, I bought this bike a few months ago and have been wanting to change some things for a while. Today my friend and I started to chop and change the seat, which then led to the start of the electrical mess relocation. As you can see from the photos, I'm aiming to leave the side panels off and have the wiring hidden (soon), keeping the triangle frame area open and bare.

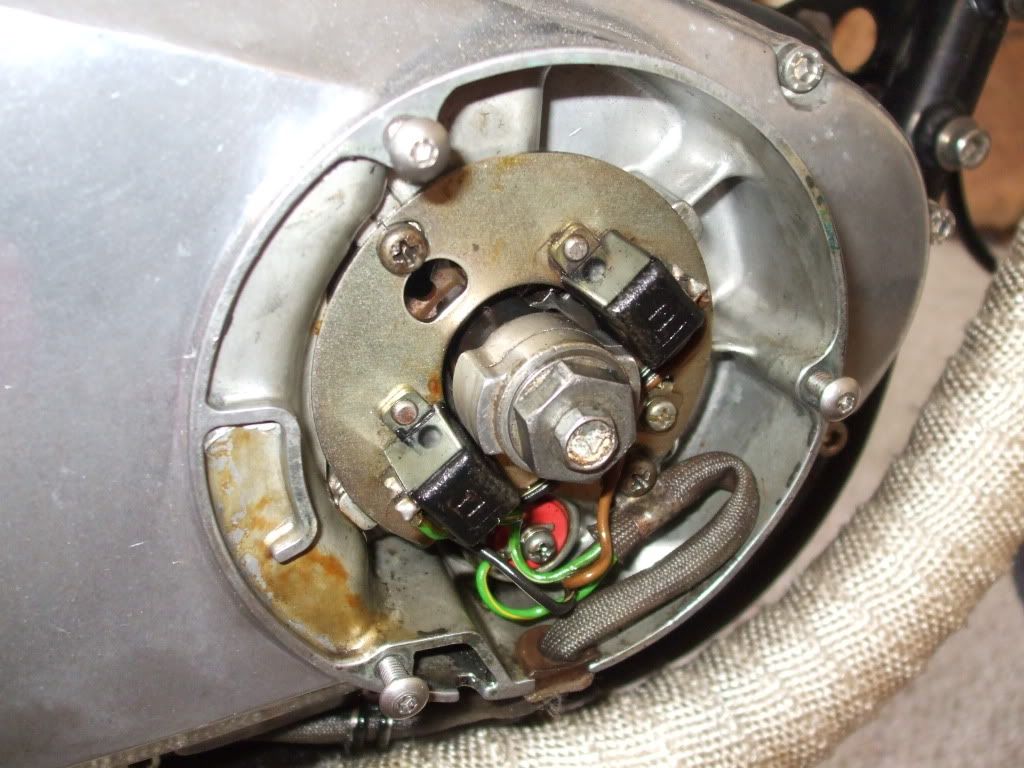
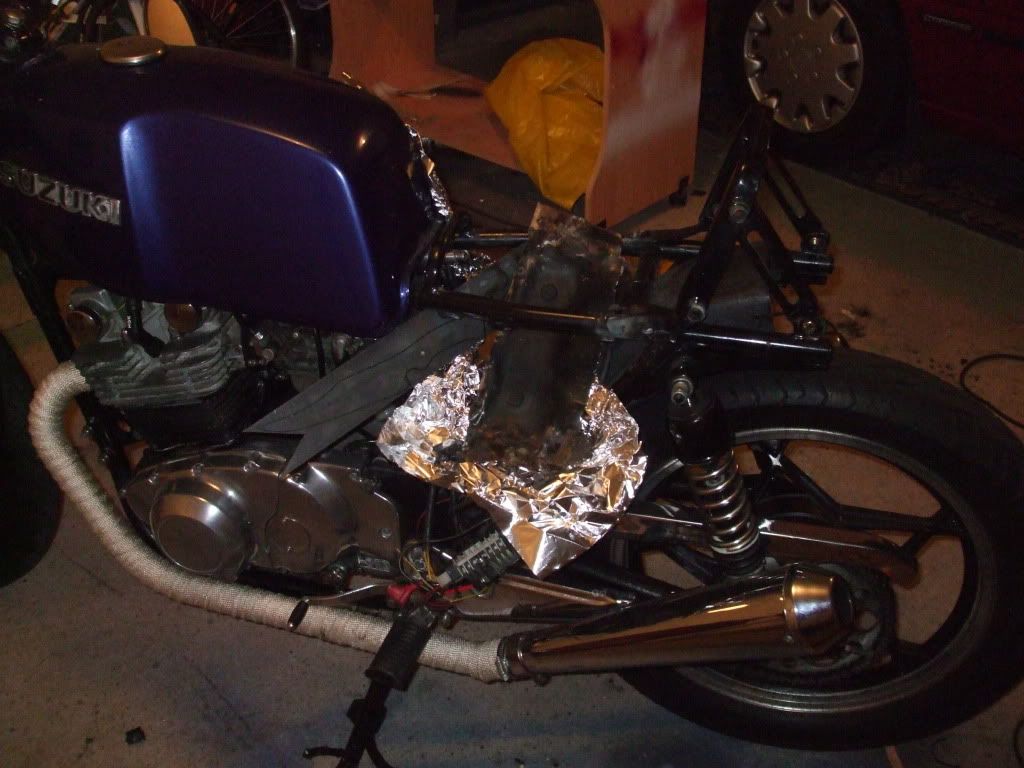
The al.foil was deflecting the sparks, removing the tabs and battery holder bracket was tedious. The original tail frame was re-used and welded to the frame to support the new seat and battery relocation.
DSCF7014.jpg


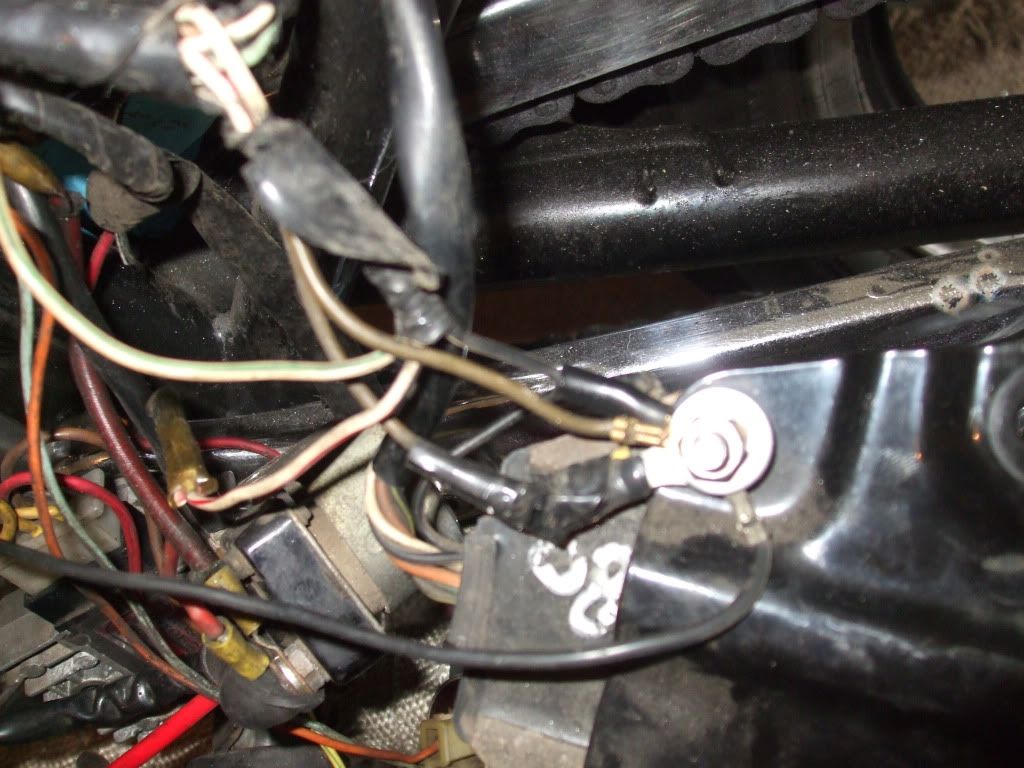
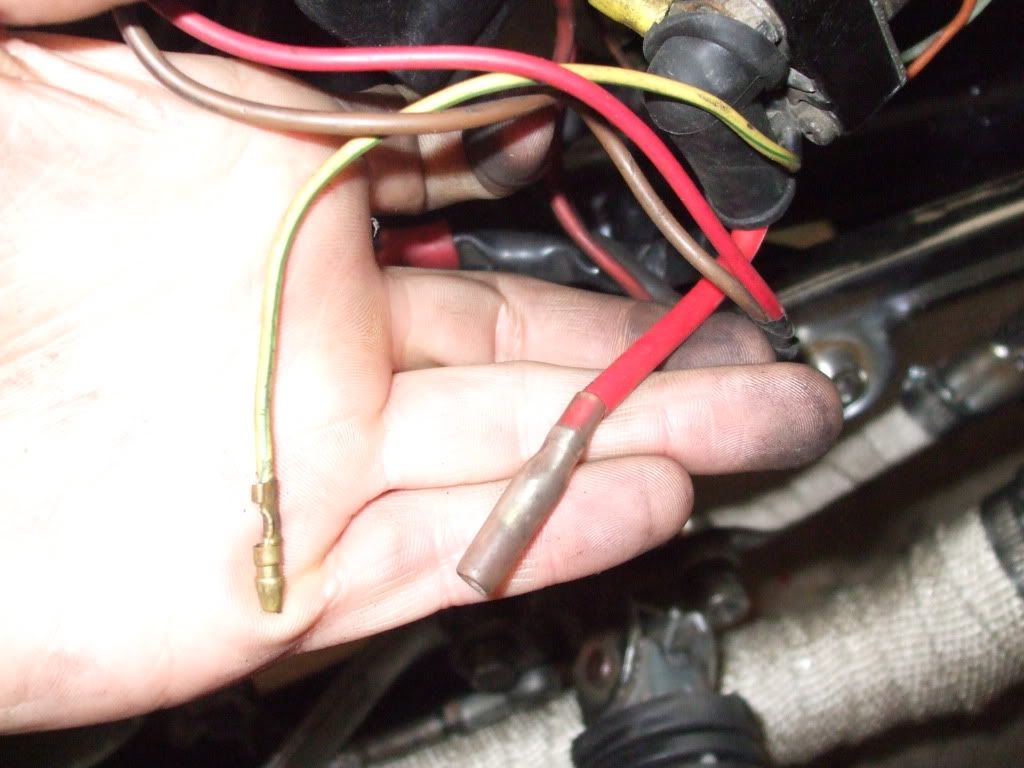
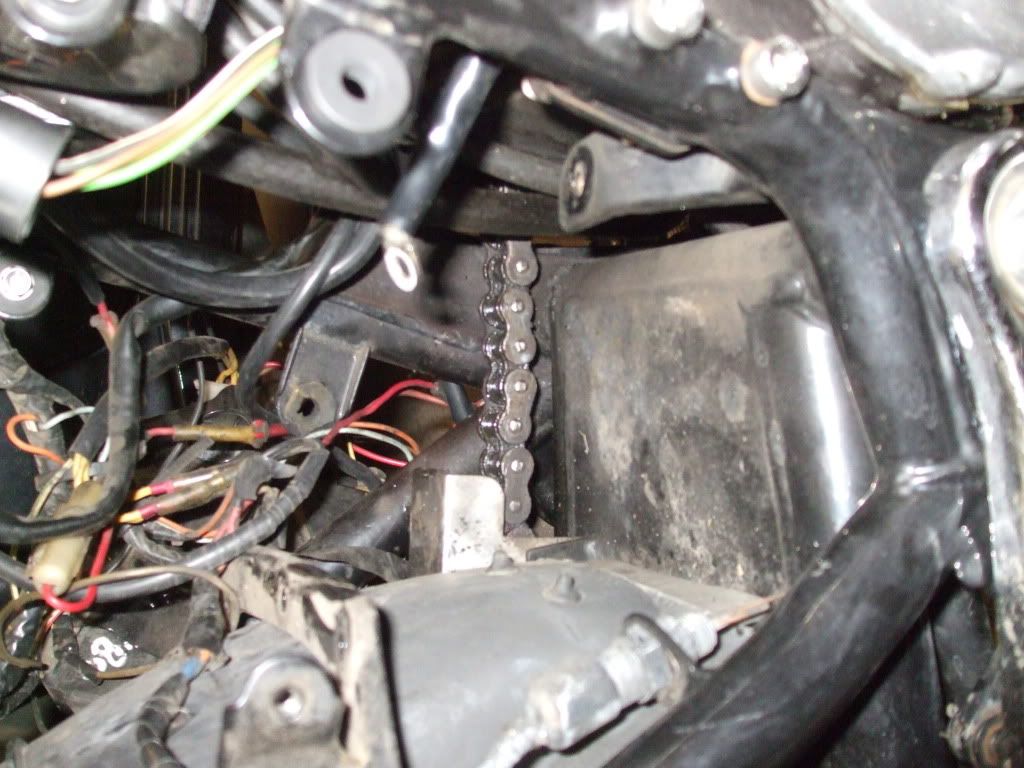
Here are two wires that disconnected along the way, I have a feeling that further elec. issues may cause problems, maybe a better job for an auto electrician.
DSCF7011.jpg


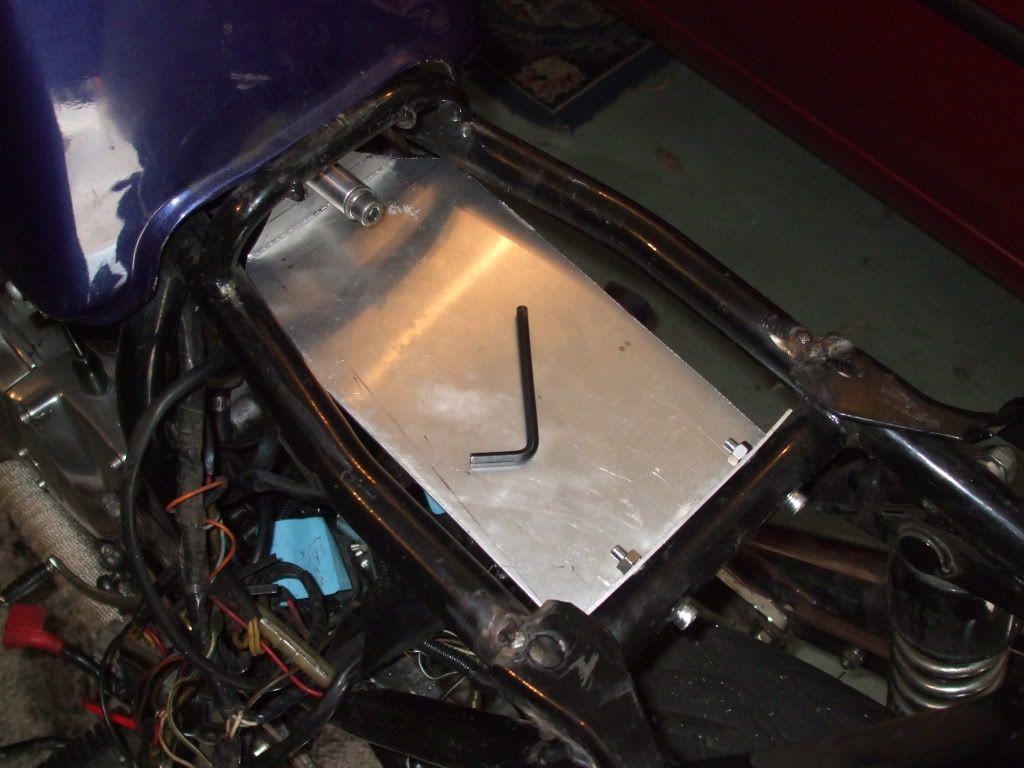
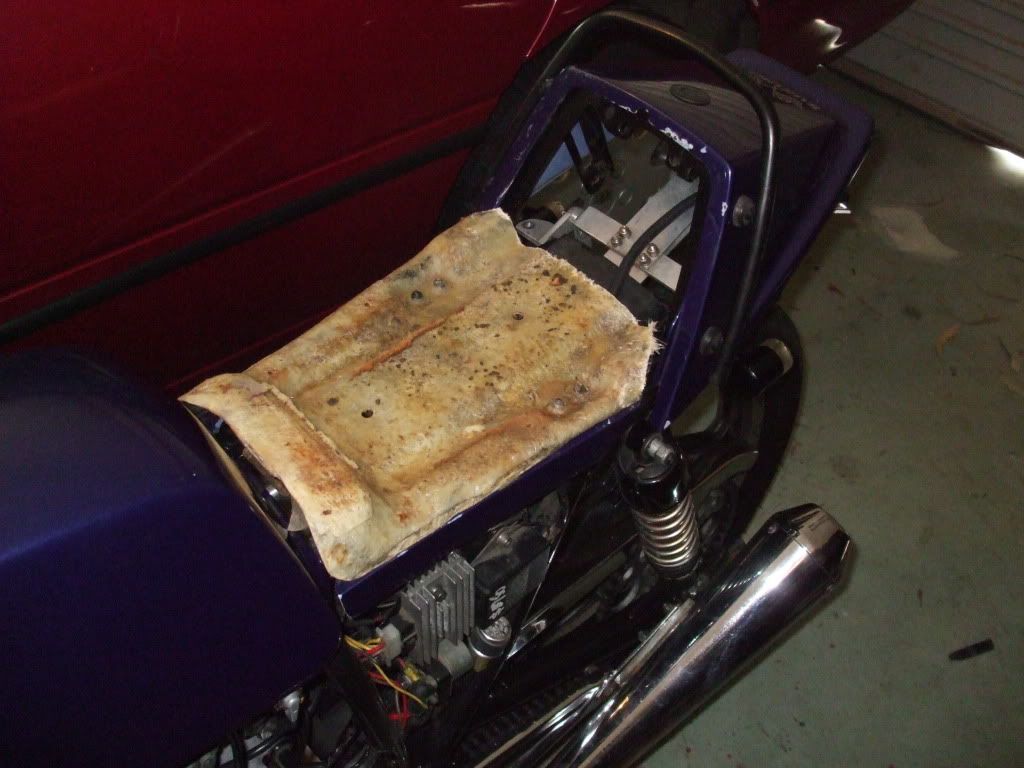
Here is an idea of the seat location, but I haven't worked out how to make the seat - fibreglass over this whole unit or keep the tail and seat pan and mock up something.
DSCF7009.jpg


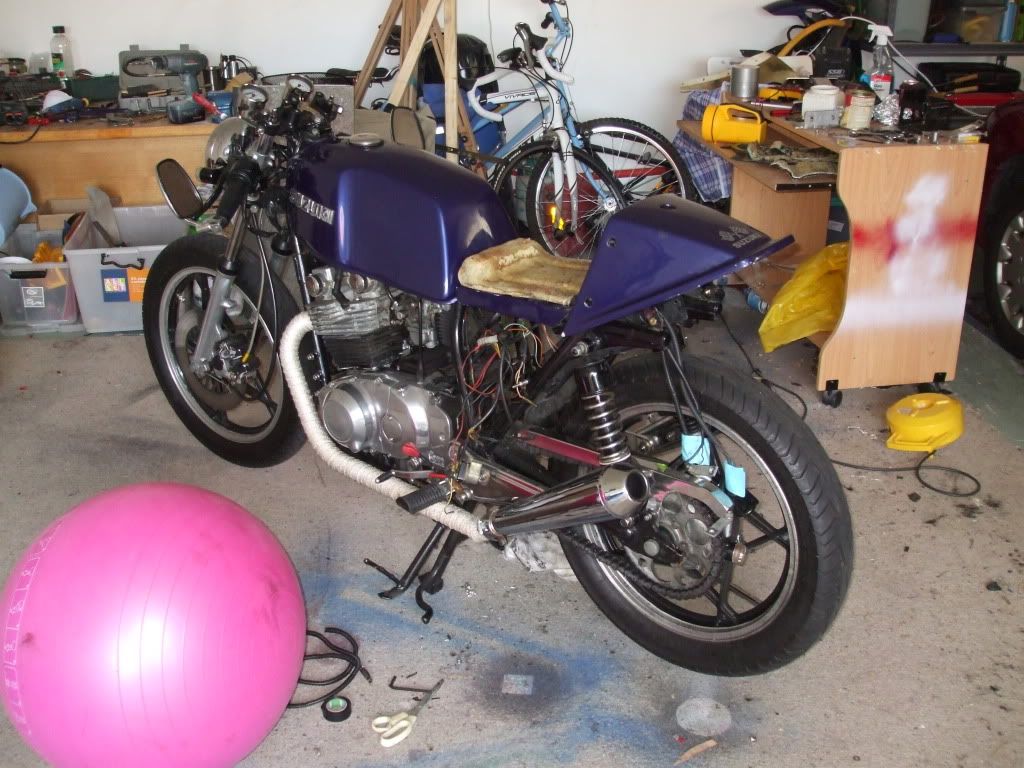
Battery removed. Tabs and battery bracket are now gone, space now for a giant lava lamp or aquarium.
DSCF7010.jpg
 
Go with the lava lamp.
Cooler and it won't slosh as much as an aquarium will.

Hmm, you have the cans I think I want.
 
Cool Collo, nice to see you putting a thread on here at last :)

Those wires you're confused about... yellow/green should be the starter solenoid trigger wire, and that red comes straight off the battery and should be where the main fuse plugs in.

Do yourself a favour and replace the dodgy glass main fuse with an inline blade type.

Looks like you're doing a similar thing to me which is trying to keep the stock seat latch in use which I think is a great idea. My suggestion with what you've done there is try to score an old seat pan from a wrecker and cut/weld it to fit.

Love those pipes too...

Leigh... told you you want Dunstall's :p
 
I'd get some green planters foam and sand em down to your design then cover with fiberglass. There is a little more involved than that but you get the idea.
 
Thanks guys for the comments. Leigh, these cans sound great on this bike and even better with the removable baffles in, plus the compacted steel wool - it's not as loud but a quality sound and more bass.

Pete, thanks for the wiring help, they must have disconnected when I was moving it about. There are a few more loose wires in there I might get your help again when I start putting the wires in a neater nest. I like the look of the original tail piece it seemed to good to throw out. The seat in photo 3 is the original seat pan which I cut down. It came with a Nitroheads seat which I might sell now and get that original style back.

Morrison, the green foam idea is good in making it the shape I want, I haven't ruled anything out yet. I really want the cheap and easy option but your idea would be good too.

It might be a while until I can progress further but will try and keep the photos going. Thanks again guys.
 
Collo,

Looking forward to see how the bike come out...suscribed!
 
looking forward to see how the stock tail section with the shortened seat turns out.
 
Collo, if that seat pan is fibreglass, then it ain't the stock seat pan... stock is metal. Good chance it was rusty and someone used it as a mould to make that fibreglass one. Mine was a bit rusty but I managed to save it.

I just went to a local place here in Brissie today and picked up some foam I ordered for the seat, one layer of higher density, one layer of lower density. The hope is that the higher density will stop me ending up sitting on the seat pan like the old foam but the lower density on top will give me a bit of an extra plushness to the seat...


Happy to give you a hand with electrical connections if I can...
 
I'm quite sure this is the original seat pan as it is steel under that fibreglass, I remember trying to cut it with a jigsaw armed with a blunt wood cutting blade. It is getting a little rusty but should be repairable, hence why I am trying to keep it and maybe make a back part from fibreglass to meet the cowl piece. Ultimately, I'd also like to use the locking mechanism or quick pins.

I think tidying up the electrics is next, then the seat. Oh, and then I aim to disassemble the bike and rebuild, but I'll wait for my new job and location first.
I really want to sand blast then powder coat the frame, does anyone know a rough estimate how much that will cost?

BTW: that foam looks comfortable, Pete.
 
Last edited:
I'm quite sure this is the original seat pan as it is steel under that fibreglass, I remember trying to cut it with a jigsaw armed with a blunt wood cutting blade. It is getting a little rusty but should be repairable, hence why I am trying to keep it and maybe make a back part from fibreglass to meet the cowl piece. Ultimately, I'd also like to use the locking mechanism or quick pins.

I think tidying up the electrics is next, then the seat. Oh, and then I aim to disassemble the bike and rebuild, but I'll wait for my new job and location first.
I really want to sand blast then powder coat the frame, does anyone know a rough estimate how much that will cost?

BTW: that foam looks comfortable, Pete.

Aaah ok, it just looked like fibreglass with no steel to me... so if there's steel there then yes it will be stock.

I'm finding it really handy being able to stick with the stock seat latch too, and all I did was make the fibreglass tail piece to replace the stock one but still retain the framework like you've done.

Not sure on sandblasting/powder coat costs I'm afraid, I sanded mine by hand then brushed POR 15 Blackcote on...

And yeah, that foam does look comfortable! I'm a bit old for thin seat padding these days, definitely looking for some comfort!
 
UPDATE:

Firstly, let me explain something; I hate messy wires.

I can't quite call it progress, as that would be indicative of success; however, I was able to tidy up some of the cables without too many problems. I'll post some photos of todays efforts soon, but I have a question...

On the right side cover there is an electrical cable that runs into the removable circular cover. See photo.

DSCF7061.jpg


Can this cable be removed or is it a sender for oil pressure or something else important? I couldn't believe the complication of wires; it's like the PO had deliberately made it complicated - one cable wrapped around five others then joined back onto itself!
 
So here is the progress from today:

An example of the mess...
DSCF7056.jpg


A stainless tray should hold it all tidy. Note: I have put the R/R under this to give it more airflow in fear that it might cook like a tv dinner.
DSCF7059.jpg


Don't mind the pink exercise ball, it makes a great rolling chair.
DSCF7066.jpg


I also don't like the oil breather hose and that other one, can I get rid of them too? haha
DSCF7067.jpg
 
Looking good indeed!

So, first question about those wires under the circular cover... don't touch 'em! Those four wires come from your signal generator (what triggers your ignitor to fire them sparks) and the oil pressure switch (what warns you when your oil pump ain't working), so leave them well alone.

Next question about all those wires going to the electrical plate there... looks to me like the PO has followed the GS Resources best practises and has attempted to locate every ground possible onto the one single grounding point, so this is a good thing! Replicate this on your custom electrics tray if you can. I did this myself...

And just a quick comment about your custom tray... having the R/R underneath for air flow is a good idea, but it looks like you're using the tank mounting bolt to support the front of the tray. I'd suggest you anchor it some other way at the front instead of or in addition to that bolt so that if you have to remove the tank it won't affect your electrics.

As to the breather hose, you need to do *something* with it legally. I believe you can get K&N filters for them, or alternatively you can have them venting into some sort of container. Essentially you need to prevent any potential fluids from exiting in an uncontrolled manner... and you also don't want them going onto your back tyre... I haven't decided what to do with mine yet but I'm thinking of adding some sort of fluid container where the breather hose and carb overflow hoses can be diverted into. Should neaten things up as well as being practical.

Thanks everyone for the inspiring comments.
Pete, once again your a big help, I'll leave that first cable alone; although, I accidentally cut one of the wires from that cable but I will fit ix.

I'll look into the other tips but I just bought a little pod breather/filter which looks good, and gets the hose off the back wheel. Thanks again!

I know I'm asking a lot of questions; but, can the fuel overflow hose (I'm guessing thats what it is) be made to go somewhere else other than to the ground? Is it common to have fuel pouring out of it?
 
Okay so I thought I would connect the wires all back up and see how I go.
The good news is the ignition light comes on and the lights and indicators all work.

The bad news is the bike won't start! It's obviously not getting power so the process of elimination begins. For those good with electrics any advice appreciated...i'll try and provide some photos
 
Thanks everyone for the inspiring comments.
Pete, once again your a big help, I'll leave that first cable alone; although, I accidentally cut one of the wires from that cable but I will fit ix.

I'll look into the other tips but I just bought a little pod breather/filter which looks good, and gets the hose off the back wheel. Thanks again!

I know I'm asking a lot of questions; but, can the fuel overflow hose (I'm guessing thats what it is) be made to go somewhere else other than to the ground? Is it common to have fuel pouring out of it?

No probs mate, glad to be of help :)

I've gotten so much help from this forum it's not funny, so very glad to pass it on when I can...

Where does the hose come from? I'm planning on getting both carb overflows and the breather hose into the same container somewhere... totally undecided where or what as yet though.

Okay so I thought I would connect the wires all back up and see how I go.
The good news is the ignition light comes on and the lights and indicators all work.

The bad news is the bike won't start! It's obviously not getting power so the process of elimination begins. For those good with electrics any advice appreciated...i'll try and provide some photos

Kill switch turned off? Right control not connected? Will it crank and not fire or not even crank?
 
ALL WORKING!! Not sure if it's now charging correctly but will test that later.
You're right Pete, theres a wealth of knowledge; including the wiring diagram, which helped yesterday. Had to remove the tank but that was okay I found some spiders calling it home.

I like that idea about a few hoses sharing the same container, let me know how you go with that. Oh and I should probably explain what fixed the problem...

A yellow and green wire from the main loom was disconnected up under the tank (a long way up I know), no wonder I couldn't find it.

Good stuff! Glad you found those spiders now instead of later :eek:

I discovered once that I'd ridden from my house at Wishart to a mate's place at Ipswich (good 40 minutes) with a redback camped under the battery tray... that was an interesting discovery!

Yellow and green wire sounds familiar... kill switch maybe? Not sure... but glad you found it either way :D
 
Back
Top