-
Finally back to it yesterday. Didn't get a huge amount of time but at least the tail piece is now ready for high build primer.
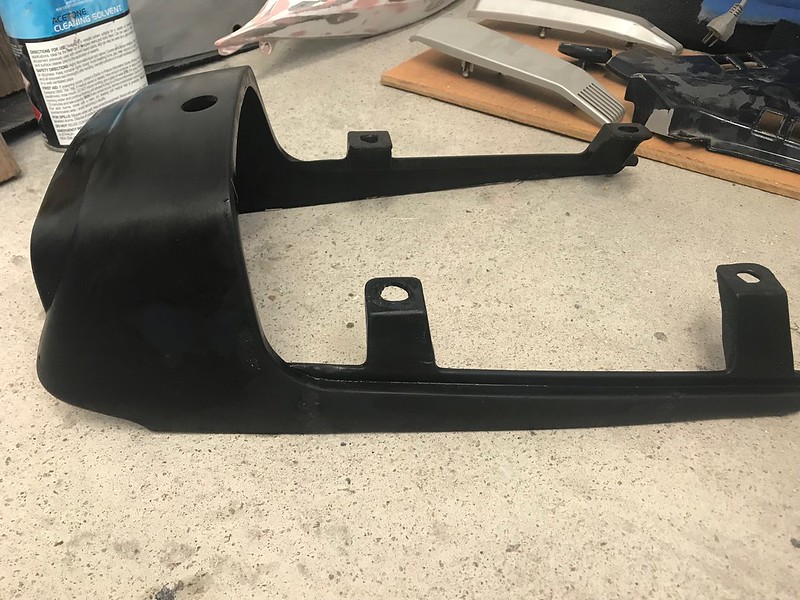 Untitled by starpoint73, on Flickr
I also got a quick start on the side covers but these won't need high build primer, they're all pretty smooth. I just need to get them keyed enough to take primer and paint.
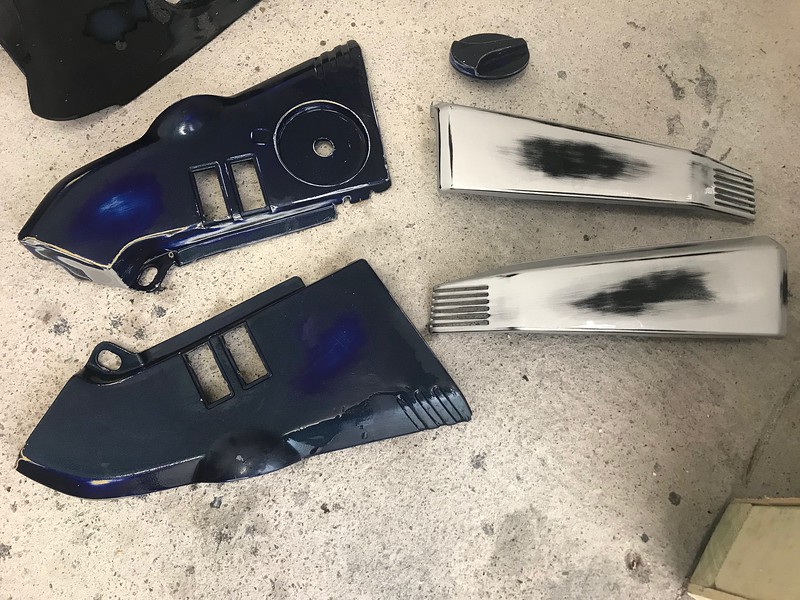 Untitled by starpoint73, on Flickr
I've booked in leave from work the last week in March and first two of April, so I'm aiming to get the high build primer done before then, which should mean I can at least get the painting done.
Ideally I'd like to get the crankcase paint done as well and hopefully during that time off I can find someone to weld second gear on also... which reminds me a I need to chamfer the gear ready for it to be pressed on and welded too.Leave a comment:
-
Cheers Larry! I did have to go back over it again after initial sanding, found a few other spots that needed filling.
Unfortunately I've become very time poor over the last 3 to 4 weeks, so I've not had any time to really finish up the prep which is very frustrating given how close I am to putting high build primer on them.
Hopefully I can get stuck back in soon because I'm really keen to get the primer done.Leave a comment:
-
How did I miss this update till now..? Nice progress on your plastic parts, Pete. Looks like you have the cracks and low spots under control with your slurry. I'm as anxious as you, I'm sure, to see everything in primer. That is such a good feeling of accomplishment when you get to that stage.Leave a comment:
-
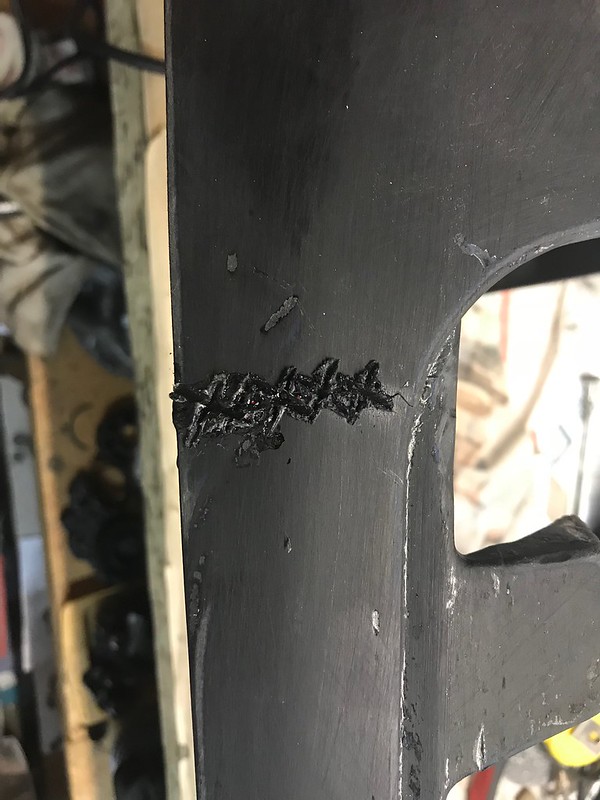
I broke out the acetone, ABS offcuts, and soldering iron last night and got stuck into the plastic repairs.
I started on the choke lever which had one of the clips broken off.
 Untitled by starpoint73, on Flickr
Not sure how well that will work as there's not a lot of material there to get to bond. I need to clean the repaired area up so it will go back together properly then I'll know if it's a good repair or not.
 Untitled by starpoint73, on Flickr
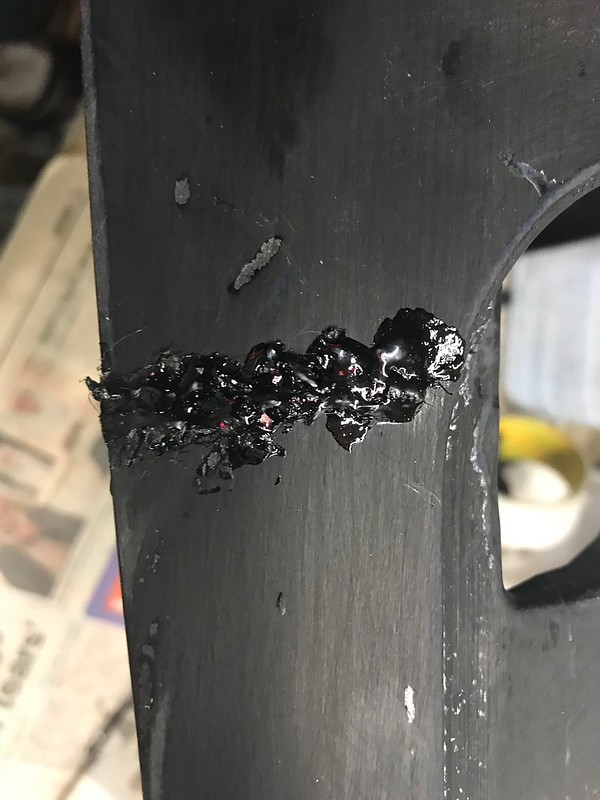
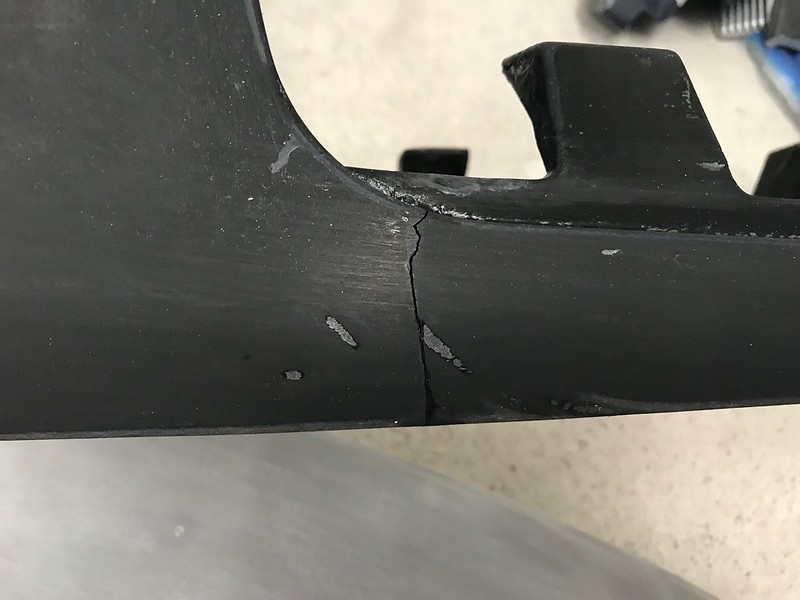
Then onto the tail piece.
I was hoping to only repair from the inside, but that wasn't strong enough alone so I had to go from the outside also.
A bit of ABS slurry pushed into the crack and then the soldering iron across it on both sides and it's nice and strong.
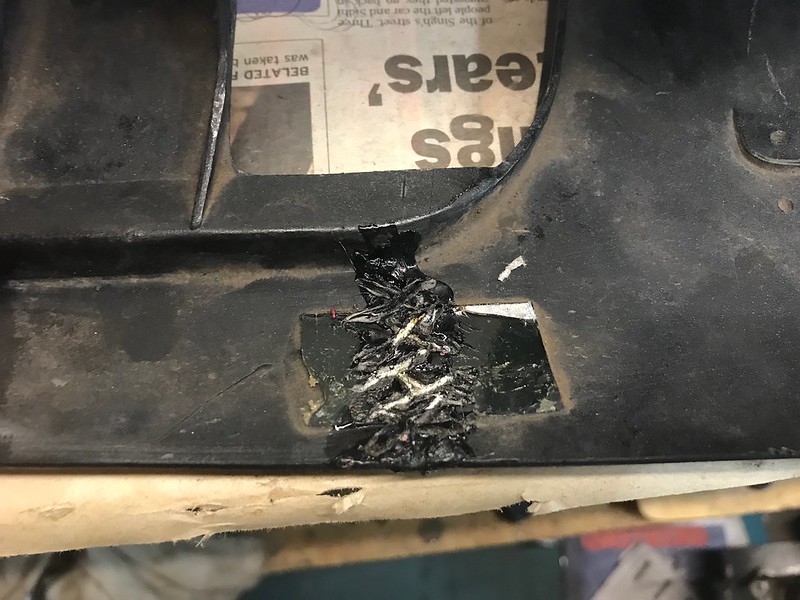 Untitled by starpoint73, on Flickr
 Untitled by starpoint73, on Flickr
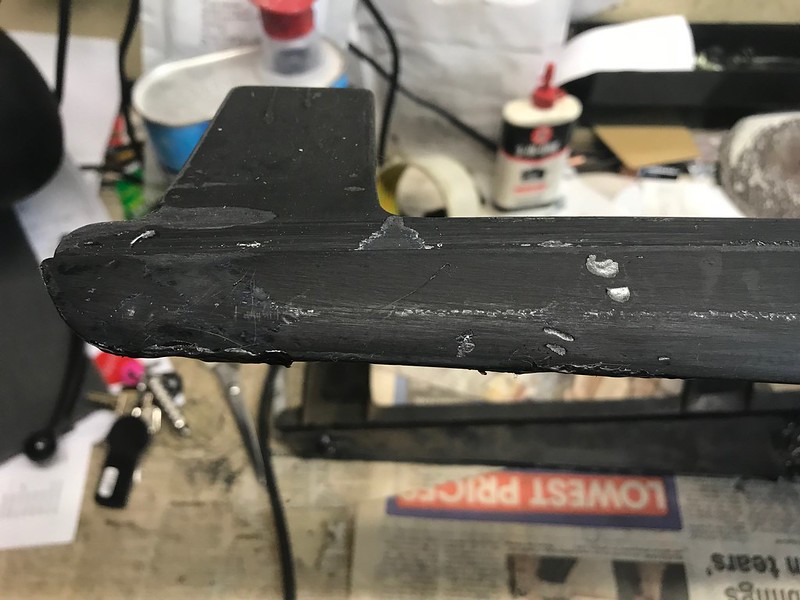
I then added a bit more slurry on the outside as a bit of a filler so I don't end up with more low spots.
 Untitled by starpoint73, on Flickr
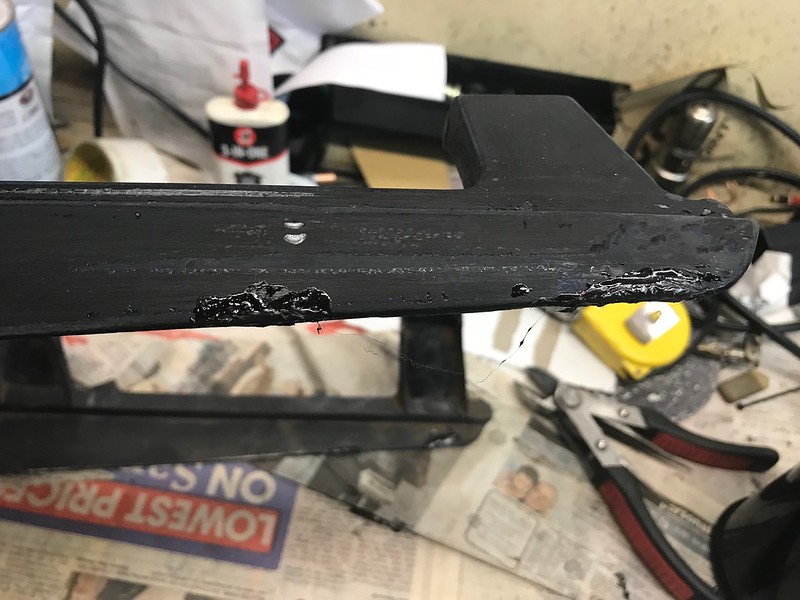
And finally there were some divets and small chunks taken out on the bottom edge towards the front that I used more slurry as a bit of a filler for.
 Untitled by starpoint73, on Flickr
 Untitled by starpoint73, on Flickr
That all just needs a sand back and tidy up now and it should be good to finish the paint prep.Leave a comment:
-
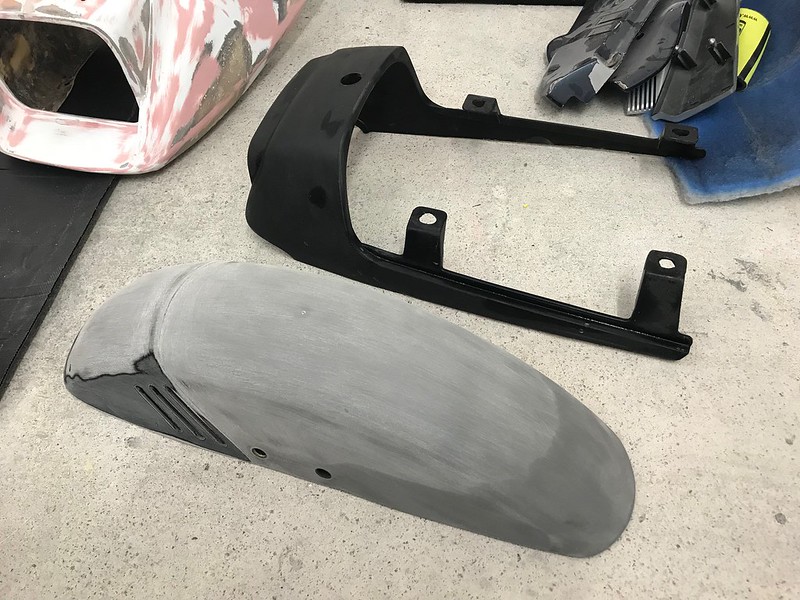
I finally got some time back on the Kat yesterday.
The front mudguard is now ready for high build primer and I got a good start on preparing the tail piece as well.
 Untitled by starpoint73, on Flickr
I'm going to need a bit more than just the high build primer on the tail piece, it's got a few reasonably deep war wounds.
I also have another plastic repair to do after hearing a crack while sanding it. On the inside was a piece of stiff rubbery material glued on and that and the paint were masking a nice big crack on the right side.
 Untitled by starpoint73, on Flickr
Leave a comment:
-
Ah ok, having never done anything like that before I didn't give it the slightest thought... until last time I was spraying in there I noticed the inlet filter material moving a bit and felt some air coming back *out* at me...Leave a comment:
-
That material should definitely help airflow. In ductwork they put turning vanes on supply side 90 degree elbows to guide the air around the corner and reduce turbulence.Leave a comment:
-
Not much to report from the weekend, although I did improve the air flow in the filter box. The fan's a bit close to the rear wall, so it felt like air was hitting the wall and blowing straight back instead of going around the corner.
I added some angled material and it seems to flow better now. It was ok with the aersols but I really needed to address it before doing any 2K painting.
 Untitled by starpoint73, on Flickr
 Untitled by starpoint73, on Flickr
I've been having trouble finding red pinstriping tape for the pinstripe that will run at the top of the silver under the black on the cowl and tank, but I lucked out at Autobarn of all places and the colour looks like it will work quite well.
 Untitled by starpoint73, on Flickr
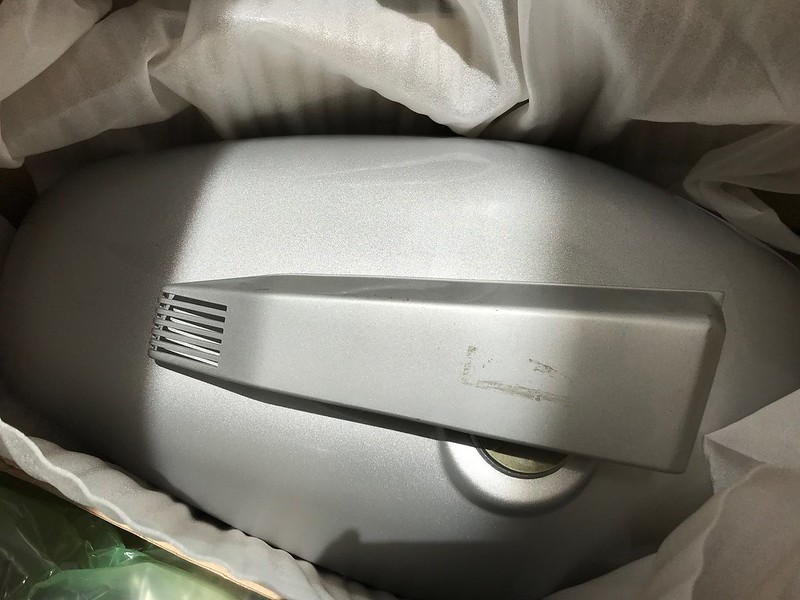
And out of curiousity I compared the tank with the 13L on the front side covers... no it's not 13L but it's close!
 Untitled by starpoint73, on Flickr
Unfortunately I did discover that the gaskets I made for the anti dive block off plates are not working and fork oil is leaking from both. I guess I'm going to have to use some sort of sealant after all.Leave a comment:
-
Haha yep Steve! Beverage of choice was a Burleigh Brewing Big Head (local brewing company, zero carb beer) which I very much enjoyed
Cool Larry, that will cut down on the prep time a bit but also I'll be able to make sure I leave the tank sealed as is too, I was a bit worried about accidentally getting stripper on the seals over the petcock and filler openings so I can leave those intact now.
Hopefully this weekend I can get a good move on finishing up the prep working and getting the shed sorted to get painting. I need to make up some frames for hanging bits and I need to improve the air flow in the filter box before I spray with 2K as well.Leave a comment:
-
I wouldn't worry about stripping that tank, Pete. Just sand it with 600 wet and dry and you'll be good to go. It'll make the perfect base for you to do a re-spray over.Leave a comment:
-
You said it, Pete! That tank is tasty.
I have seen a lot of pics of opening new parts boxes with a celebratory drink near by.
Beverage of choice? haha.Leave a comment:
-
It sure is Charlie!!! Love getting those red and white labelled packets... and that tank... mmmm tasty!
All good Larry, as nice as the tank looks it's going to get painted, going to have some trouble bringing myself to touch that paint but it's gotta be done. I'm undecided if I should strip it or just rub it back though. Best strip it I think.
While the paint on that tank is very nicely done, it's not the correct 13L Suzuki Kat paint which saved me significantly on the tank price as I had to buy the paint anyway for the other bits.
The plan is the 13L on the cowl, tank, front mudguard, and side covers. Then it'll be gloss black on the top part of the cowl and tank and rear part of the front mudguard as per the stock style Kat two tone paint jobs, and the tail piece will be gloss black.Leave a comment:
-
Now comes the challenge of color-matching the silver of that beautiful gas tank for the rest of the parts..silver is tough. Not only the shade, but the metallic coarseness. Might be easier to re-paint it along with all the other parts. What the heck, it's only time and money, right..? Or am I assuming incorrectly that you're even painting the bodywork silver..?
Last edited by nvr2old; 01-18-2018, 01:44 PM.
Or am I assuming incorrectly that you're even painting the bodywork silver..?
Last edited by nvr2old; 01-18-2018, 01:44 PM.Leave a comment:
.png "Powered by vBulletin")
Required reading for all forum users!!!
Welcome!
Register to access the full functionality of the GSResources forum. Until you register and activate your account you will not have full forum access, nor will you be able to post or reply to messages.A note to new registrants...
All new forum registrations must be activated via email before you have full access to the forum.A Special Note about Email accounts!
DO NOT USE sbcglobal.net, att.net, bellsouth.net or email.com email addresses when registering for the forum! Email that our system sends out to these email servers is treated as SPAM and you will never receive your activation email, or any other email that our system may send out. Use an email address from gmail.com or some other email server.A note to old forum members...
I receive numerous requests from people who can no longer log in because their accounts were deleted. As mentioned in the forum FAQ, user accounts are deleted if you haven't logged in for the past 6 months. If you can't log in, then create a new forum account. If you don't get an error message, then check your email account for an activation message. If you get a message stating that the email address is already in use, then your account still exists so follow the instructions in the forum FAQ for resetting your password.Have you forgotten your password or have a new email address? Then read the forum FAQ for details on how to reset it.
Any email requests for "can't log in anymore" problems or "lost my password" problems will be deleted. Read the forum FAQ and follow the instructions there - that's what we have one for...
New users should be sure to read the FAQ as well as the posts in the Announcements forum. This will answer many of the questions you may have about how this forum works.
Before posting questions in the forums be sure to use the forum search function!!! Odds are your question has already been asked and answered before. And when posting, please make sure that you post to the correct forum.
Finally, be sure to check out BassCliff's website here. He has useful information that can't be found on this site. His welcome page containing useful GS information can be found here. Be sure to check it out!
If you are a returning visitor to the forum and can't log in using your old forum name and password, chances are your account is deleted. Just create a new forum account and you should be all set.
Leave a comment: